Welcome To Catalee – A mobile React Native master architect listing app template.
Firstly, a big thanks for purchasing this template, your support is truly appreciated!
This
document covers the installation and use of this template and often reveals answers to common problems
and issues – read this document thoroughly if you are experiencing any difficulties. If you have any
questions that are beyond the scope of this document, feel free to pose them in the dedicated support
section.
Getting Start
System Requirements
NodeJS
Make sure you have a recent version (15.11 or later) of Node installed
globally. We recommend installing Node and Watchman using Homebrew.
Run the following commands in a Terminal after installing Homebrew:
brew installnode
brew installwatchman
React Native Cli
Node comes with npm, which lets you install the React Native command line interface. This develop tool
is using for React Native Cli
Run the following command in a Terminal:
npm install-g react-native-cli
Getting Start With React Native CLI
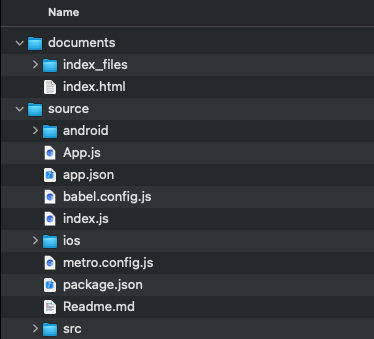
After unzip the download pack, you’ll found a source folder with all the
files. Open a Terminal in source folder and run command
Terminal after installing
Catalee - Source
To delete package-json.lock, node_modules, ios Pods and podfile.lock and run npm install and pod install
npm run all
To delete ios Pods and podfile.lock and re-install pod then rebuil on iOS
npm run pod
Build .AAB file and view in Finder
npm run build-aab
Build .APK file and view in Finder
npm run build-apk
Clear cache server and watchman
npm run restart
IOS
Install node modules
cd./source
npm install
Install cocoapods
sudogem installcocoapods
cd./ios
pod update
pod install
Link libraries, fonts and resource icons
npx react-native link
Run with Ios Simulator by the command
open-a Simulator
npx react-native run-ios
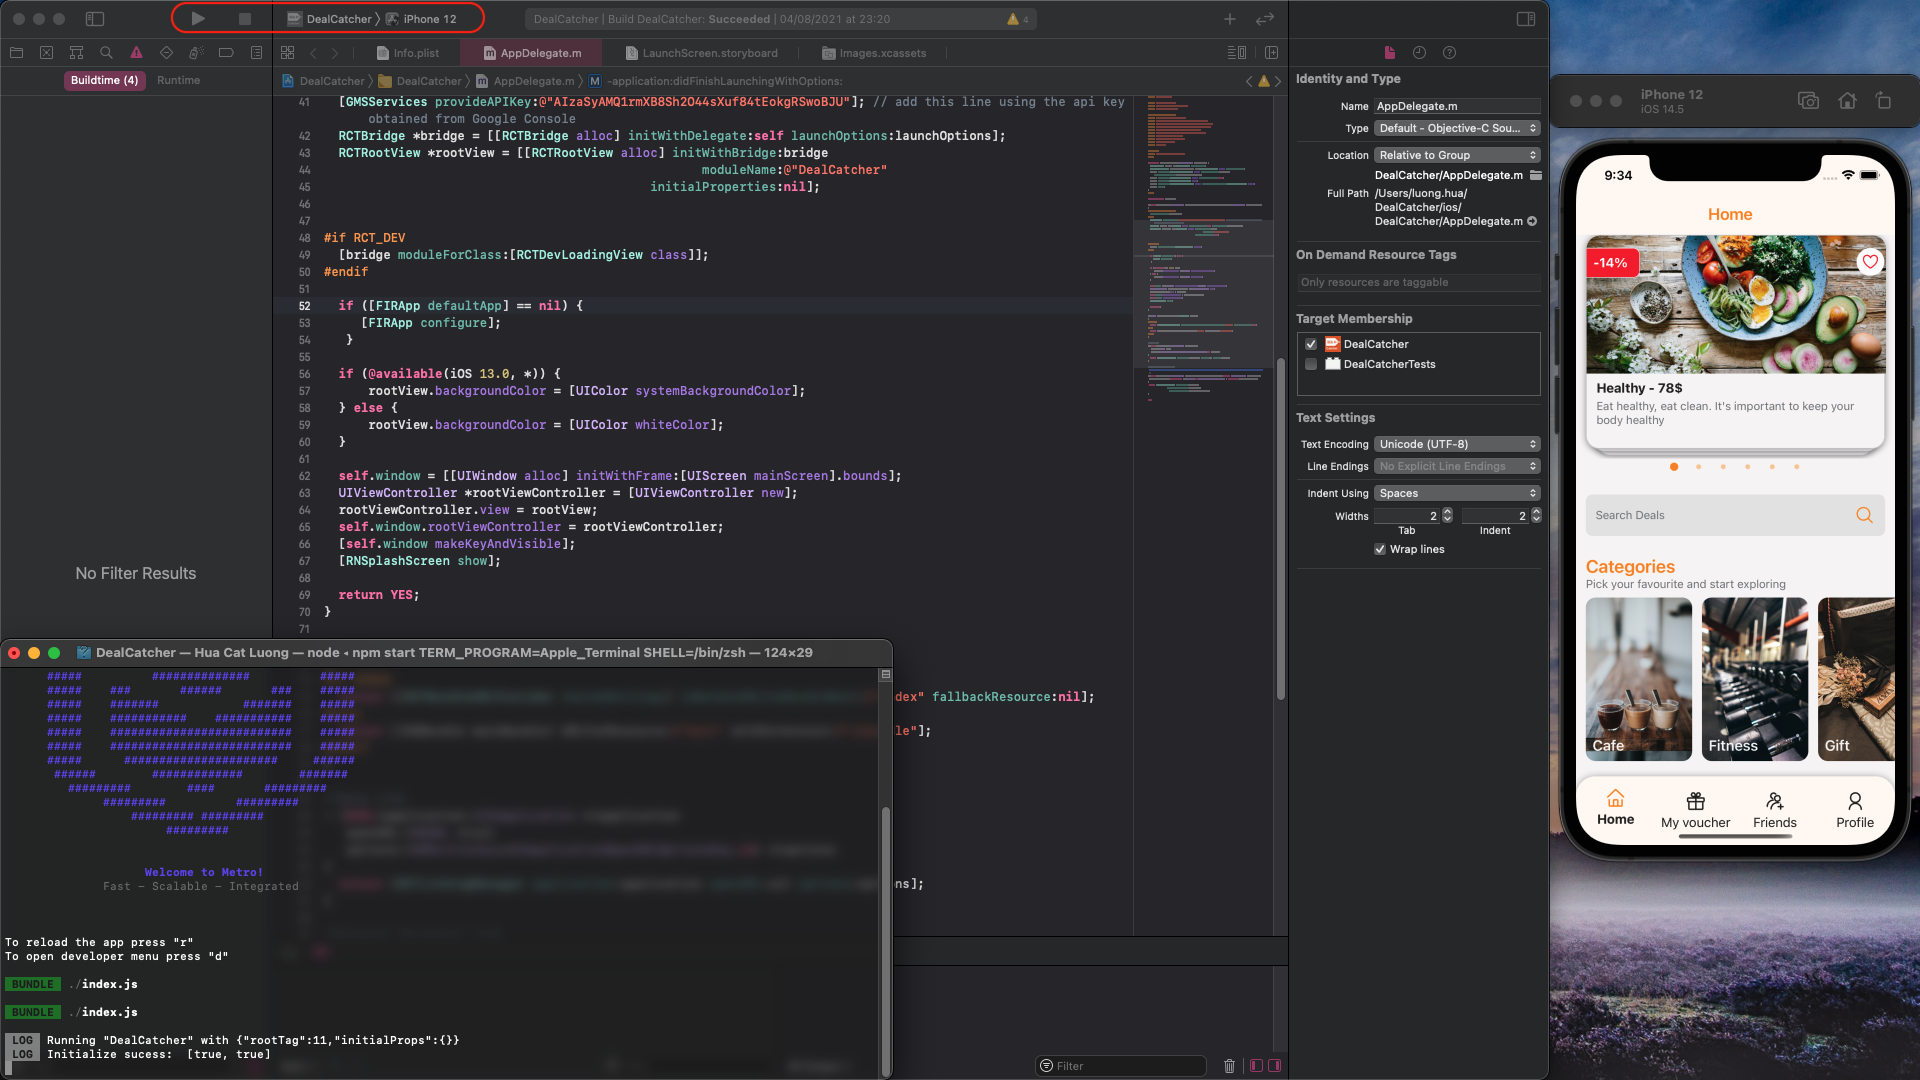
Using your Xcode and open file ./source/ios/Catalee.xcworkspace
and do follow steps below
Select your simulator device
Build project with simulator and your enjoy your development
Catalee – IOS Simulator
Android
Before getting started, please read thoroughly this React Native official docs for how prepare with
Android development https://facebook.github.io/react-native/docs/getting-started After
you finished setup for Android, we will move to next step
Install node modules
cd./source
npm install
Link libraries, fonts and resource icons
npx react-native link
Start a development server by the command
npx react-native start
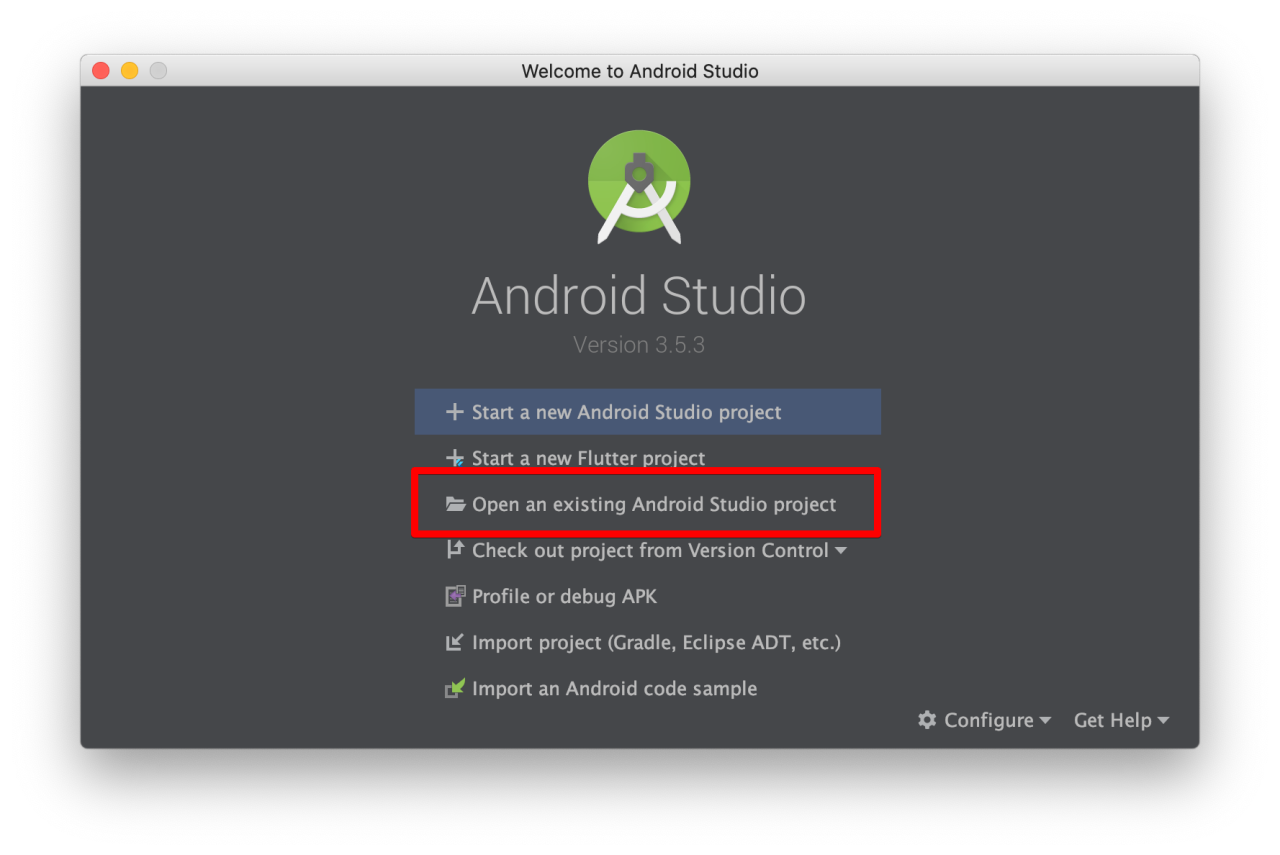
Using your Android Studio (3.5.3 or last
version) and build project with folder ./source/android
Catalee – Android Studio Build
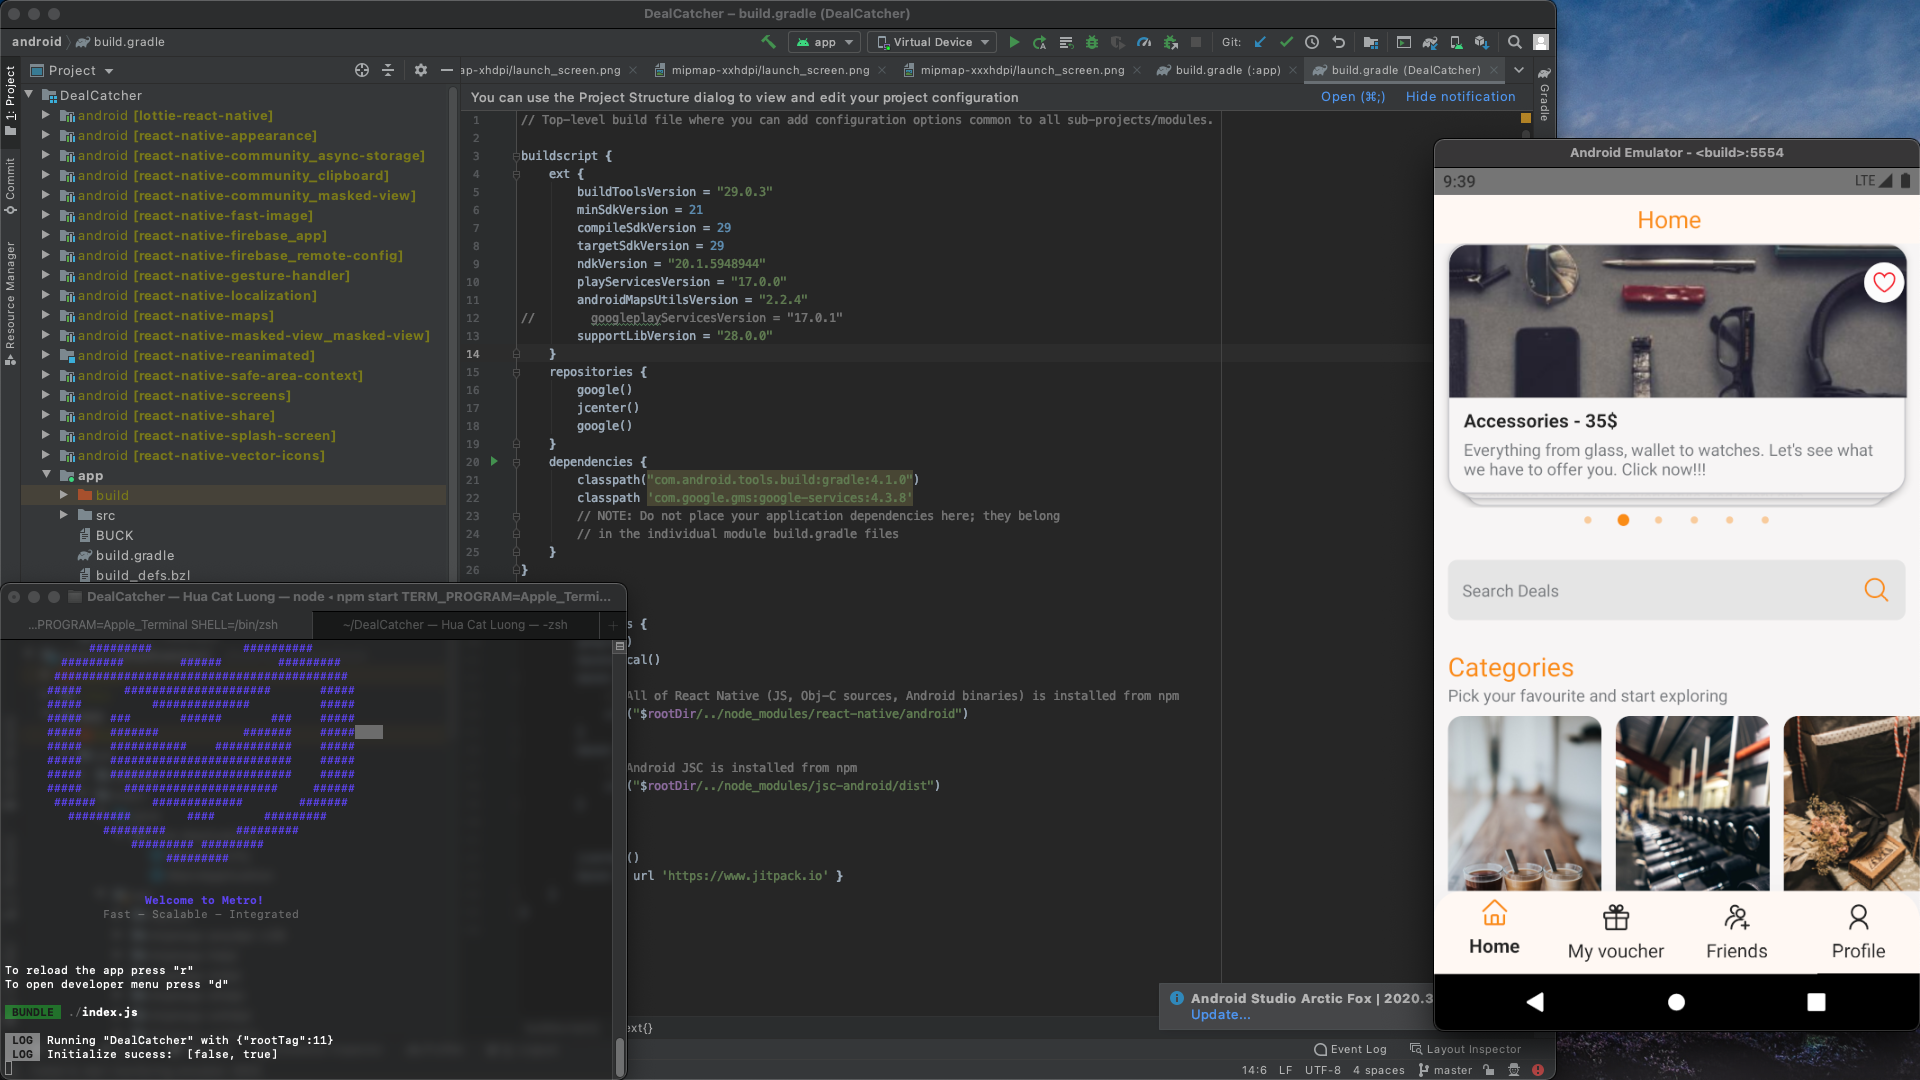
After then please do following steps below
Step 1: ADM Manager – Install your virtual devices for use
Step 2: Sync project with Gradle files
Step 3: Select virtual device and Run your application
Catalee – Android Studio Build with Virtual Device
Note: Import your js file to index.js in each folder in order to use it
Catalee – Export components
Api
File locate: ./src/api/..
Network.js: all images use for the app
Components
File locate: ./src/components/..
Common components that could be re-used in your app: Button, Icon, AppText, AppImage, Input, PopUp,
…
ImageAssets
File locate: ./src/imageAssets/..
Store all your images, animation json here.Declare it in index.js to use it across the app
LanguageJson
File locate: ./src/languageJson/..
Store all your translation here ./src/languageJson/en.js ./src/languageJson/vi.js ./src/languageJson/fr.js
...
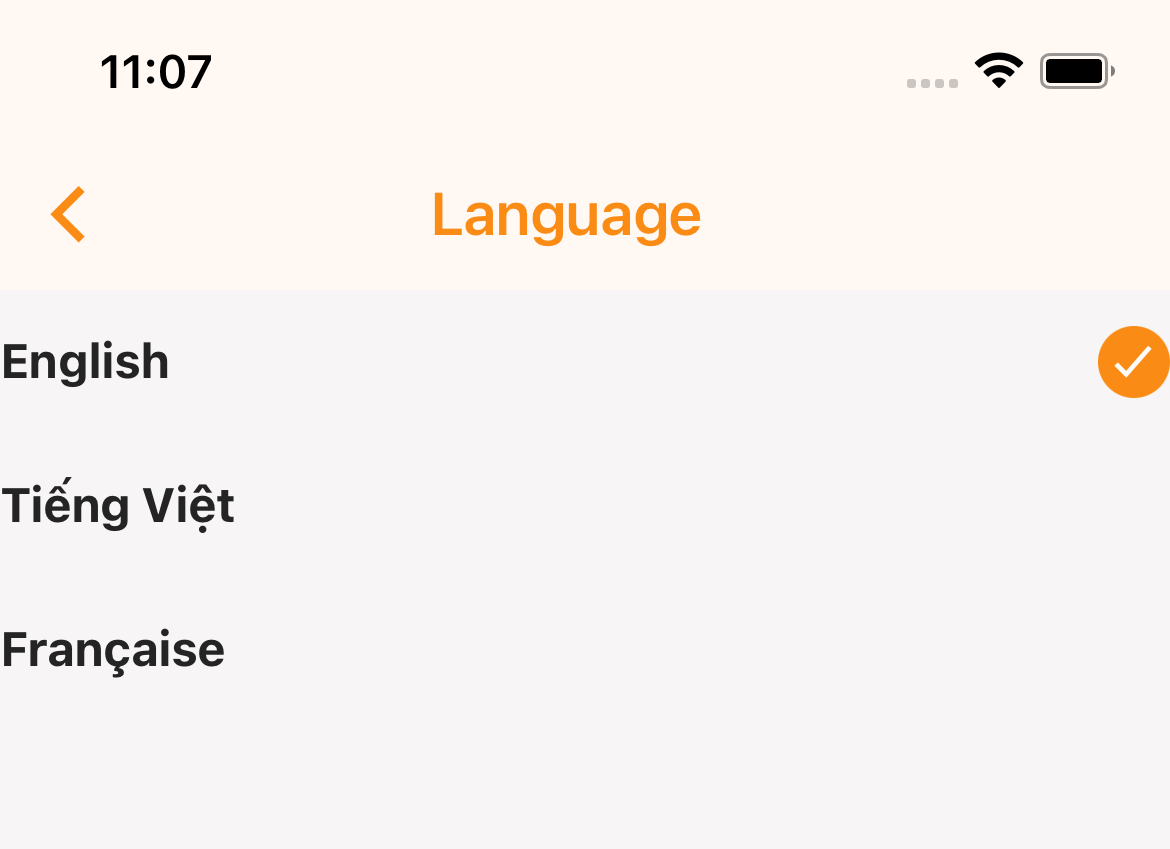
LanguageNameList.js: Language name will be shown in settings. See example below:
exportdefault{
en: 'English',
vi: 'Tiếng Việt',
fr: 'Française',
);
Catalee – Choose language
Navigation
File locate: ./src/navigation/..
AppContainer.js: The app Navigation architecture. Including AppContainer (the NavigationContainer),
TabStack (bottom tabs stack), StackScreen (all the screens stack)
Navigator.js: Common navigation function (navigate, showLoading, hideLoading, goHome ...)
Redux
File locate: ./src/redux/..
./src/redux/actions: Store redux action
./src/redux/constants: Action name constants
./src/redux/reducers: Redux reducers
configureStore.js: Configuration for redux and combineReducers
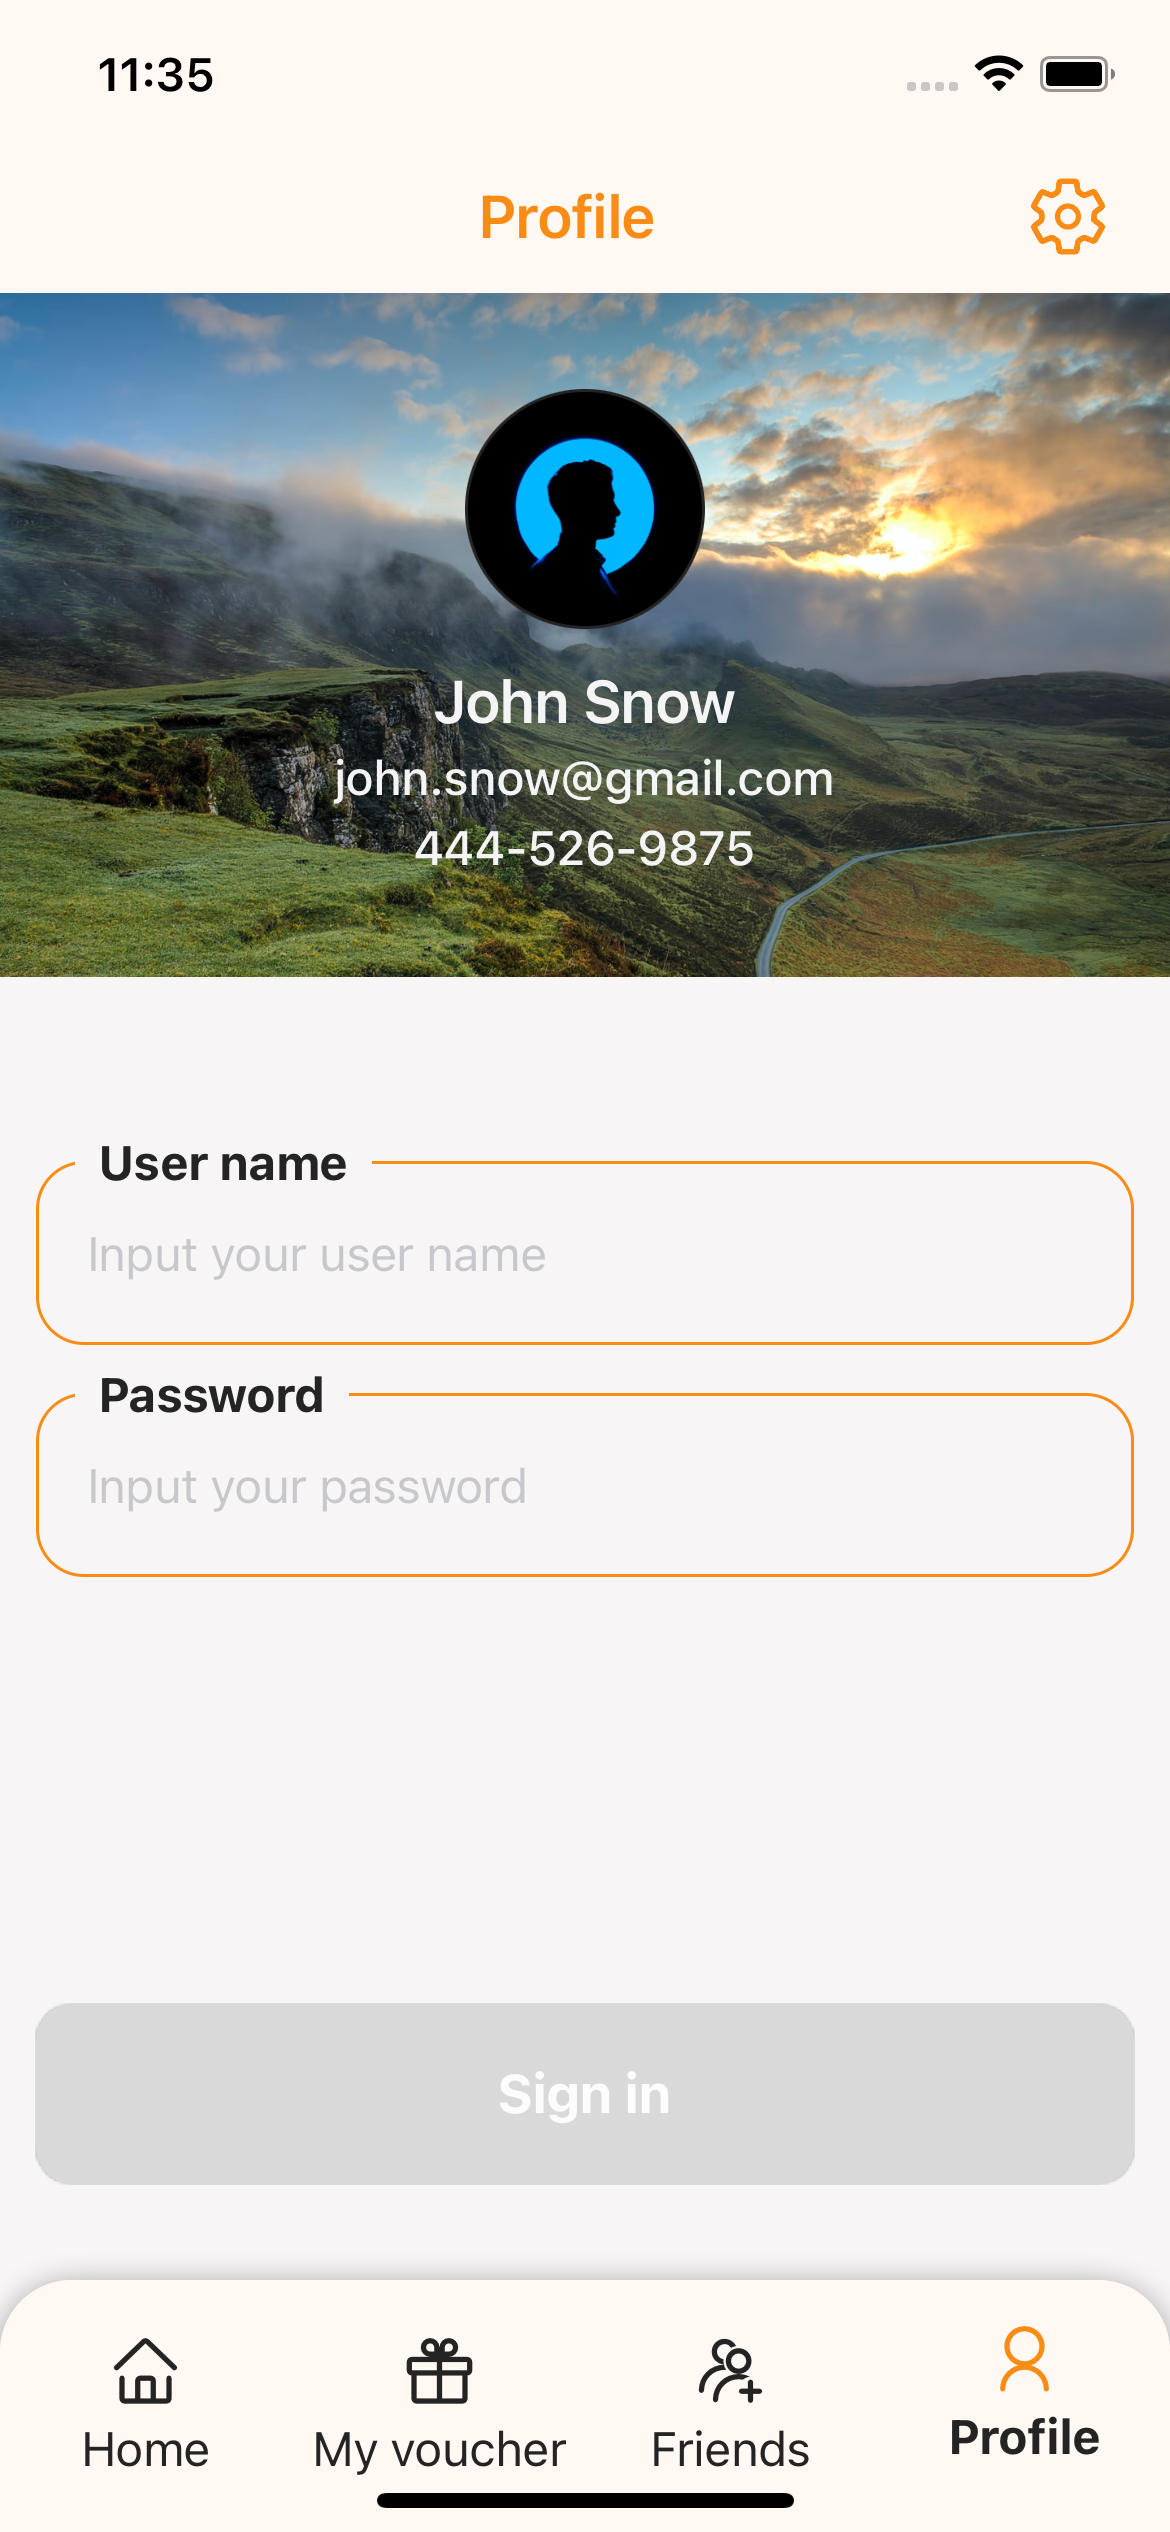
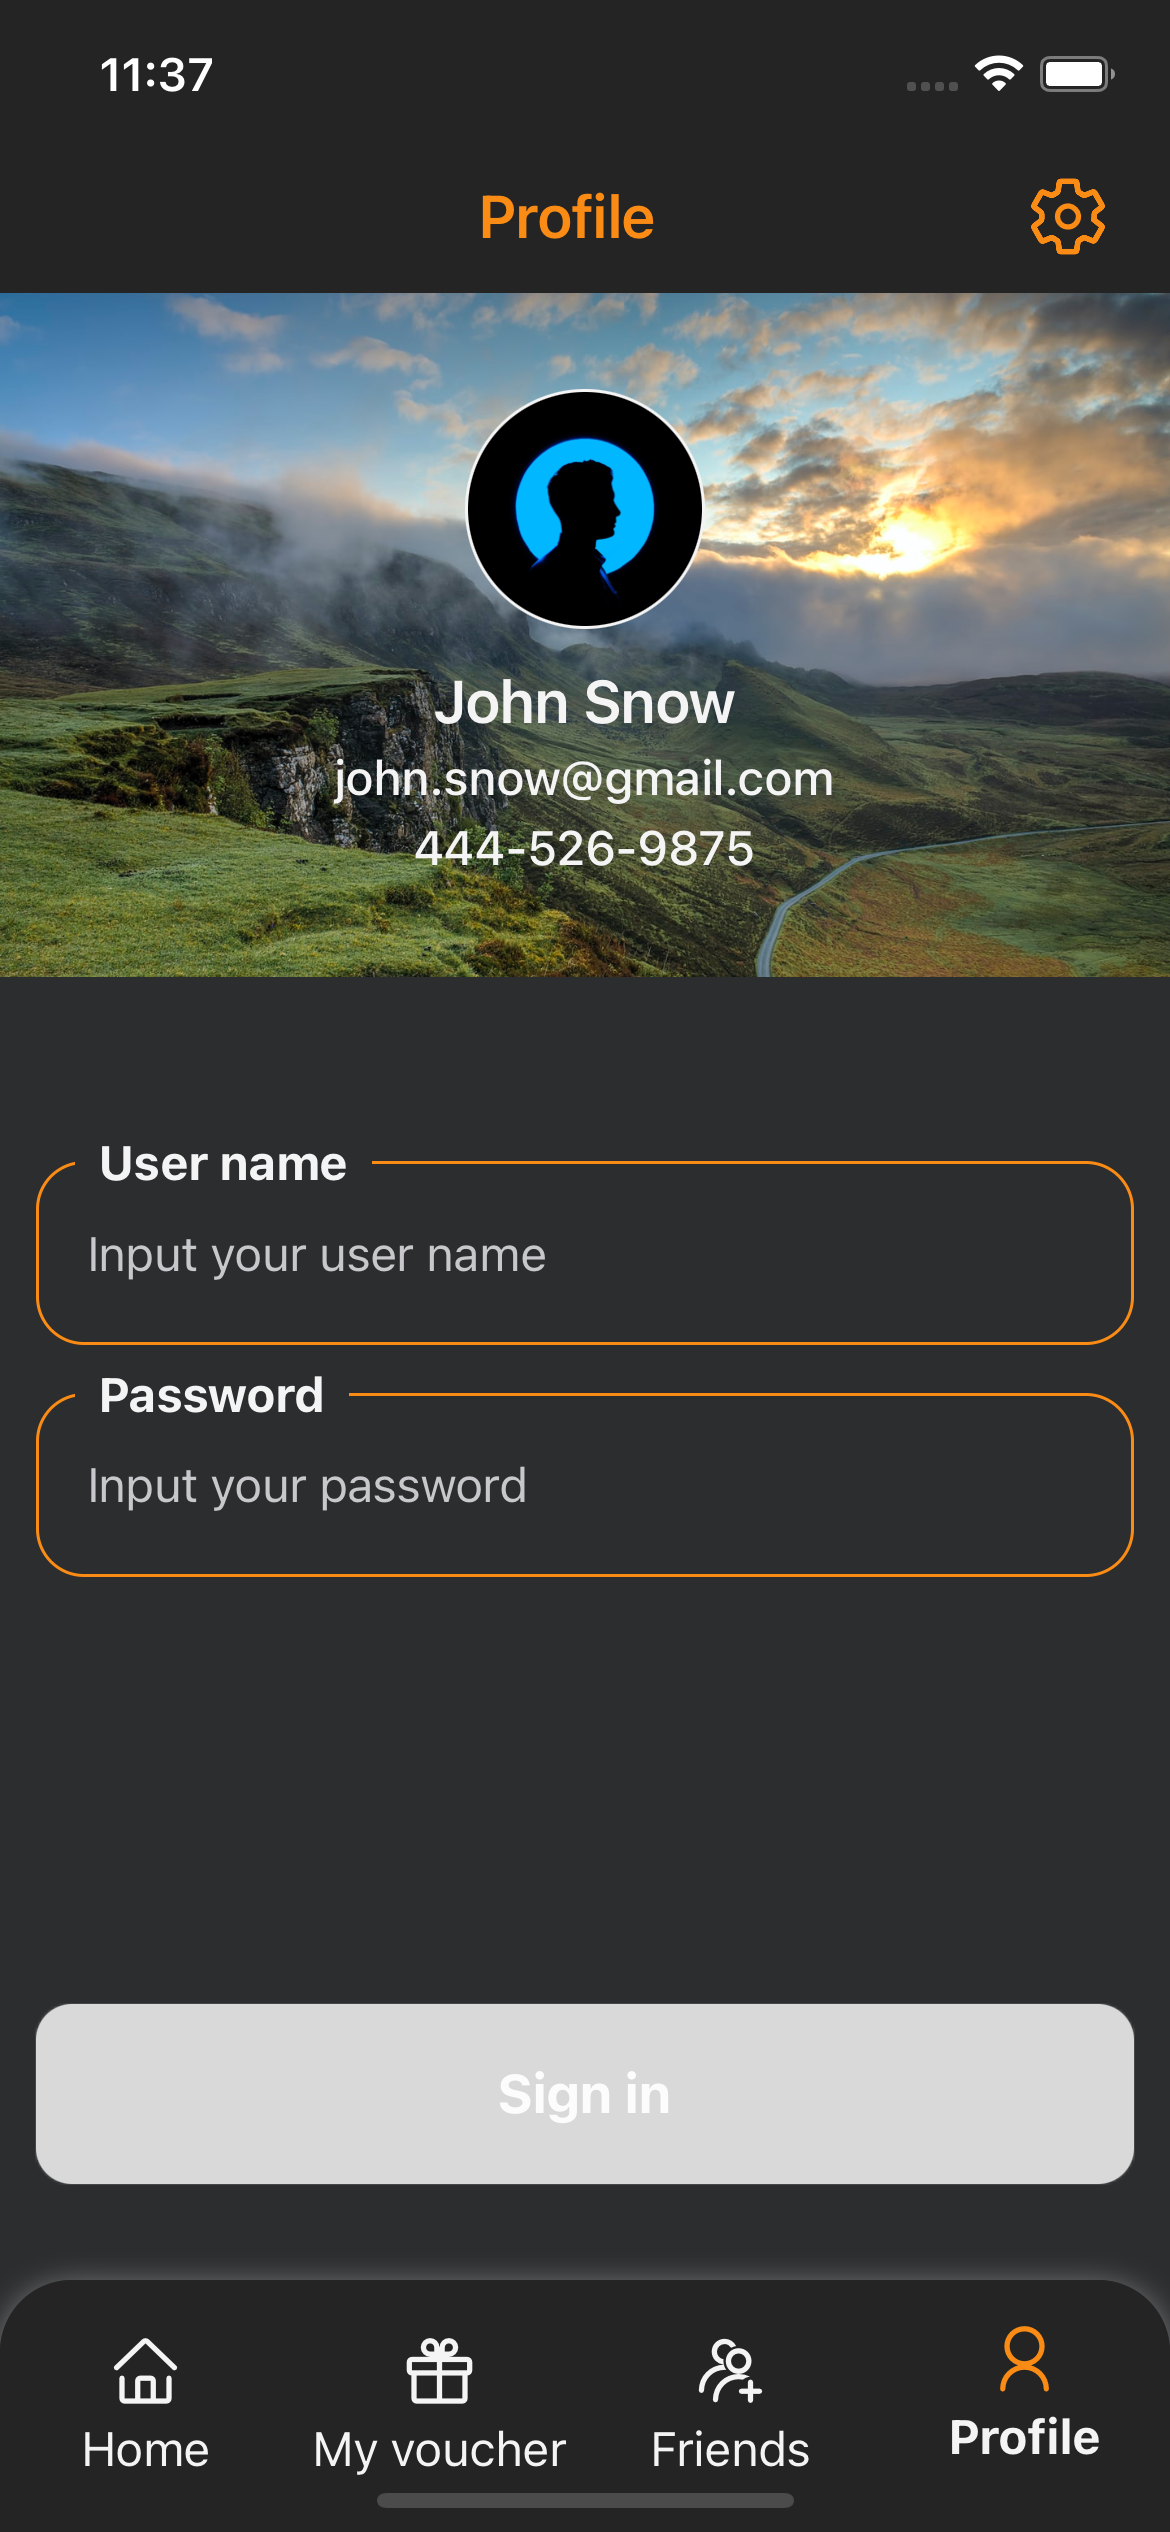
With React Native template, we’re not focus much about redux, we just make sample authentication as
temp for control simple login screen
Screens
File locate: ./src/screens/..
All your screens will go here
Utils
File locate: ./src/utils/..
Commons function for use in the app will be put here, So if you develop or add more common functions,
just add it here !
Colors.js: Declare all colors here
CommonUtils.js: Common calculations functions
Spacing.js: Common spacing
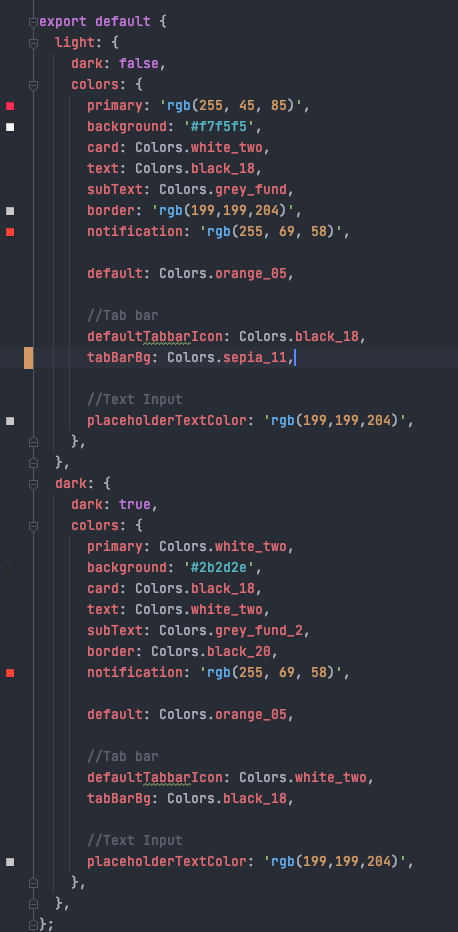
Themes.js: Declare themes color for dark and light
...
Themes and Styling
Currently, the app support 2 themes - Light and Dark
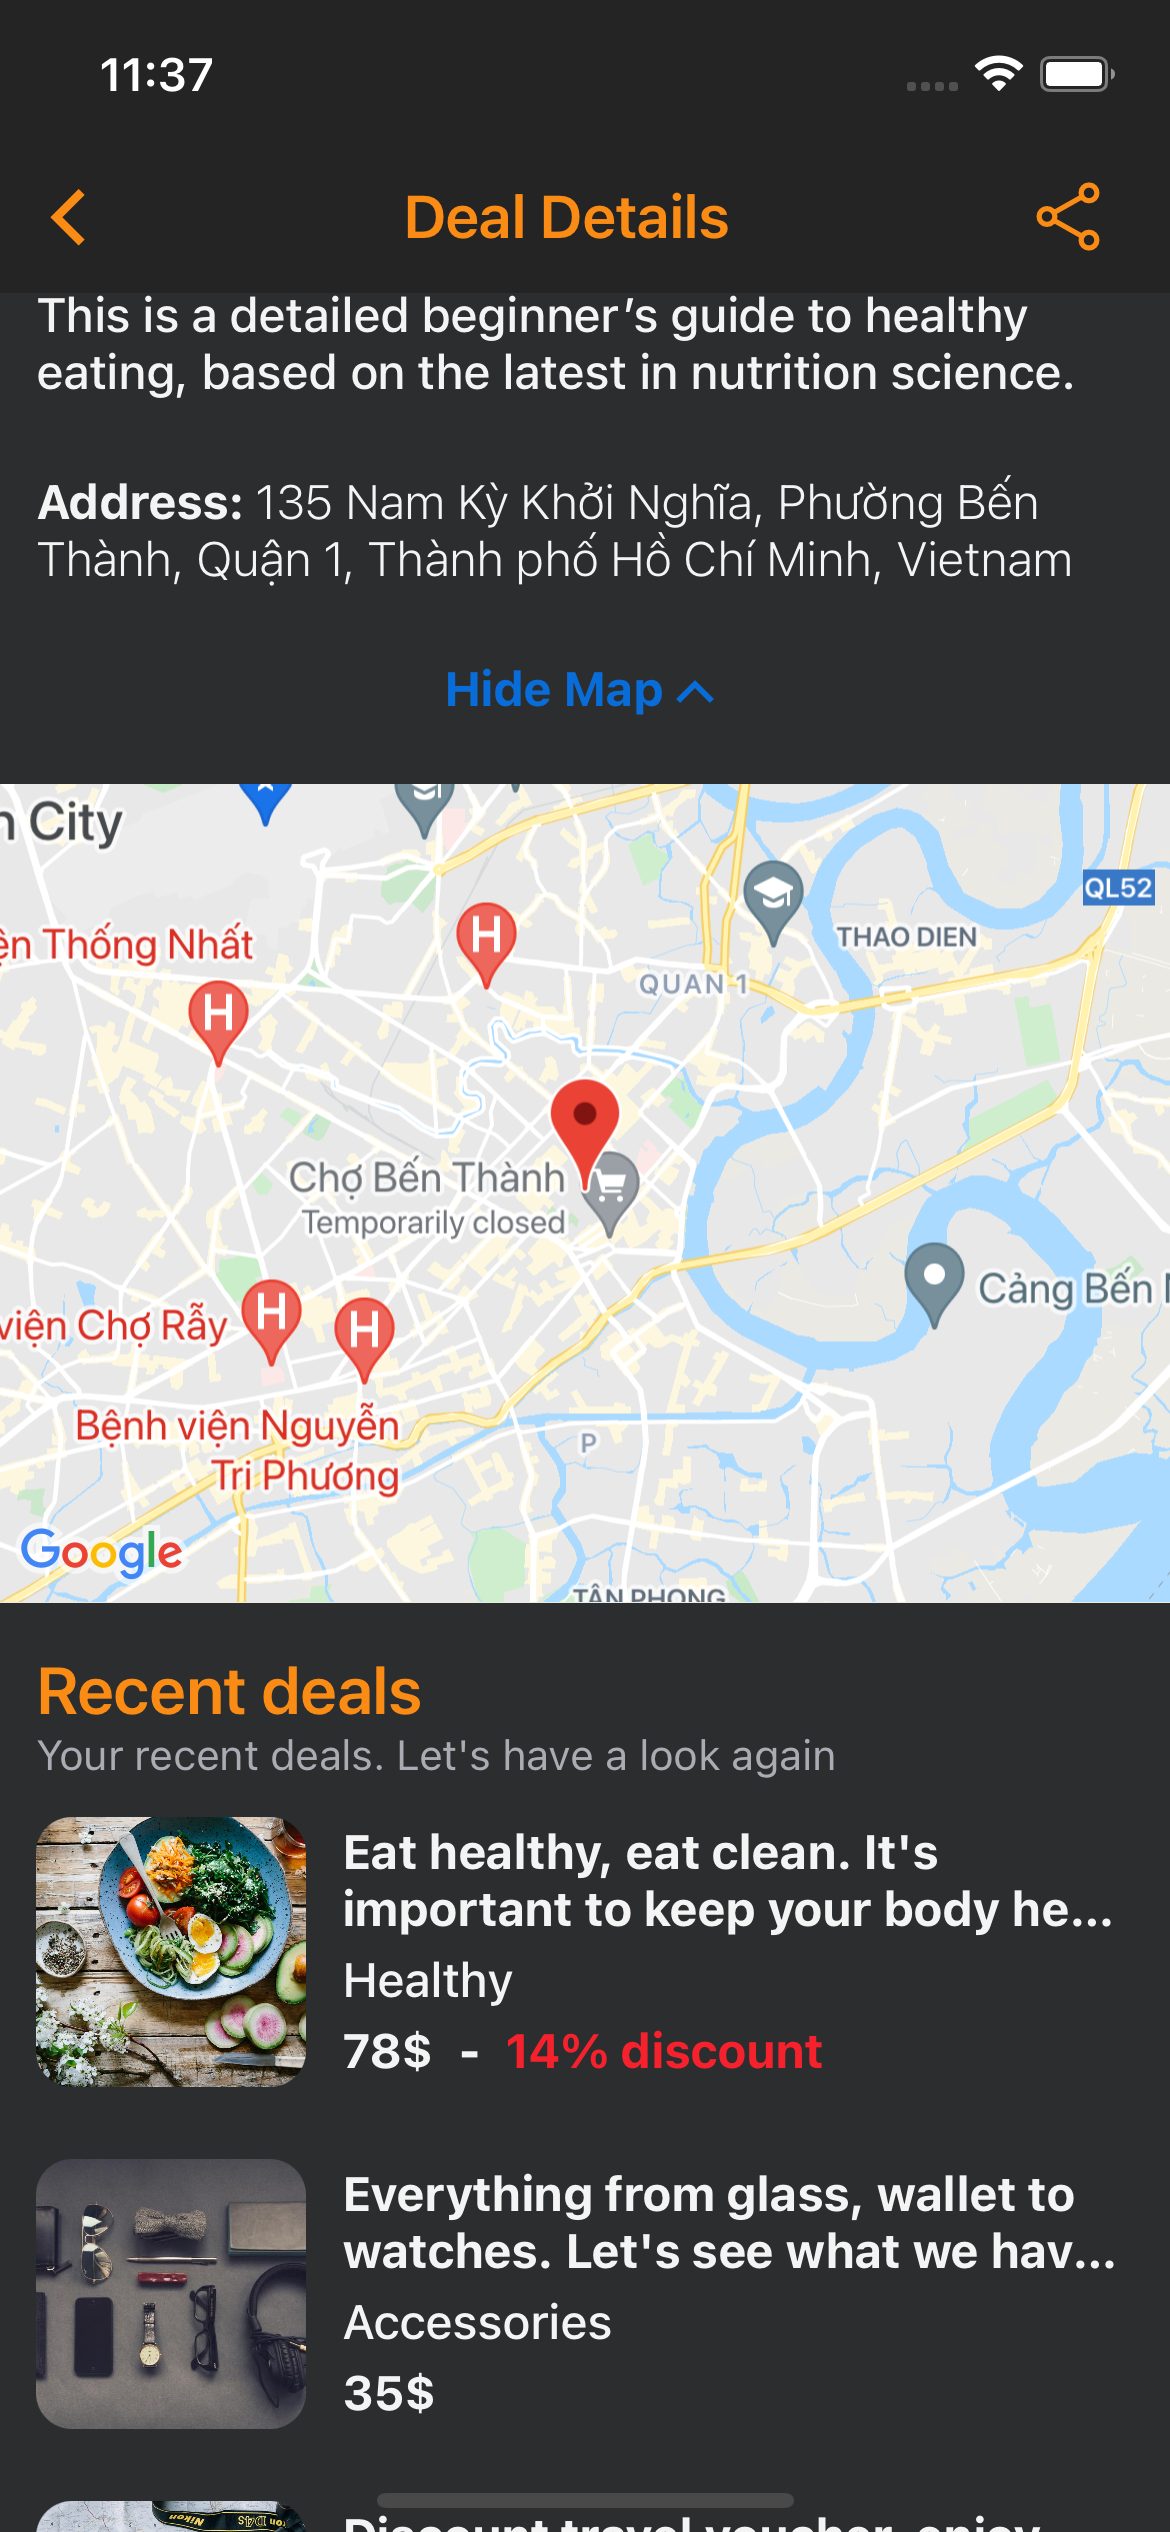
Light
Catalee – Light Theme
Catalee – Dark Theme
You can change the theme prop dynamically and all the components will automatically update to
reflect the new theme. Open file ./app/utils/Themes.js
The main color palettes following properties:
default
background
text
border
placeholderTextColor
Catalee – Theme Color
How to use Themes colors
import{ useTheme } from "@react-navigation/native";
exportdefaultComponent = () => {
const { colors } = useTheme();
let backgroundColor = colors.background;
}
In this example, the backgroundColor will be '#f7f5f5' in Light theme and '#2b2d2e' in Dark theme
Have a look and compare at the Catalee – Theme Color picture above
Colors
File locate: ./src/utils/Colors
The template are using these static colors, you can add more here
If you want to customize colors or for matching with your business colors. Just refer more with
websites below for pickup right color palettes
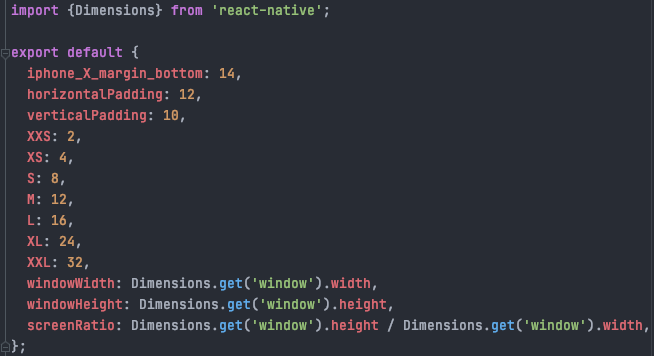
To maintain clean and consistent spacing your application, we support define common spacing
following and you can add more here ./src/utils/Spacing.js
Catalee – Spacing utils
How to use common Spacing?
import{ Spacing } from "@utils";
exportdefaultComponent = () => {
const marginTop = Spacing.L;
const paddingBottom = Spacing.M * 2;
const height = Spacing.windowHeight * 0.5;
const containerWidth = Spacing.windowWidth;
}
Radius
Common radius is in ./src/utils/Radius.js
exportdefault {
XXS: 2,
XS: 4,
S: 8,
M: 12,
L: 16,
XL: 24,
};
How to use common Radius?
import{ Radius } from "@utils";
exportdefaultComponent = () => {
const topLeftRadius = Radius.M;
const bottomRightRadius = Radius.S;
}
Additional Components Demo Usage
This is a demo screen
Here, you'll find all main components are listed with very details instruction on how to use them, download the template now to explore and do experiments
Also, you'll find comment instruction all over the source code
From Home navigate to Profile -> Settings -> Demo, here is a short demo video:
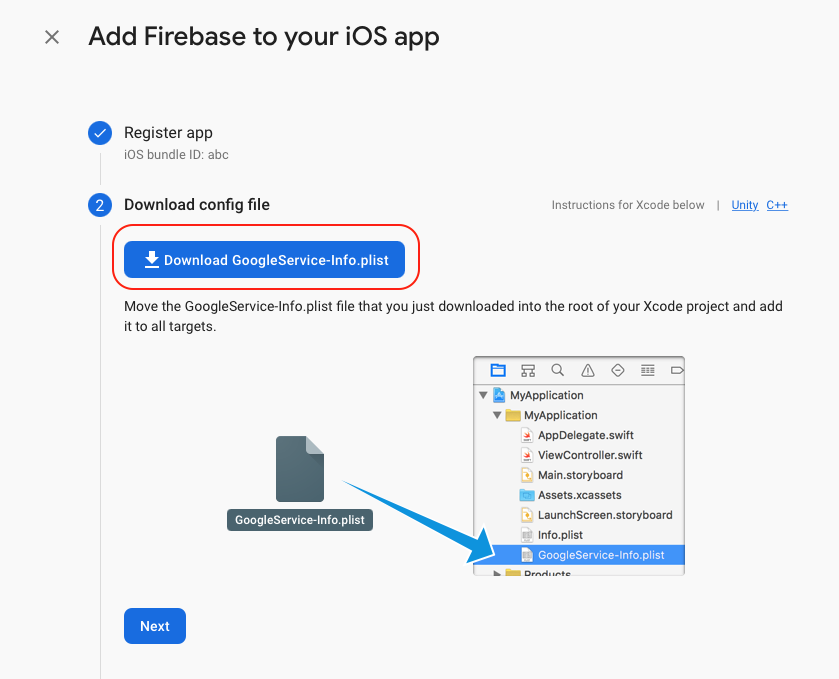
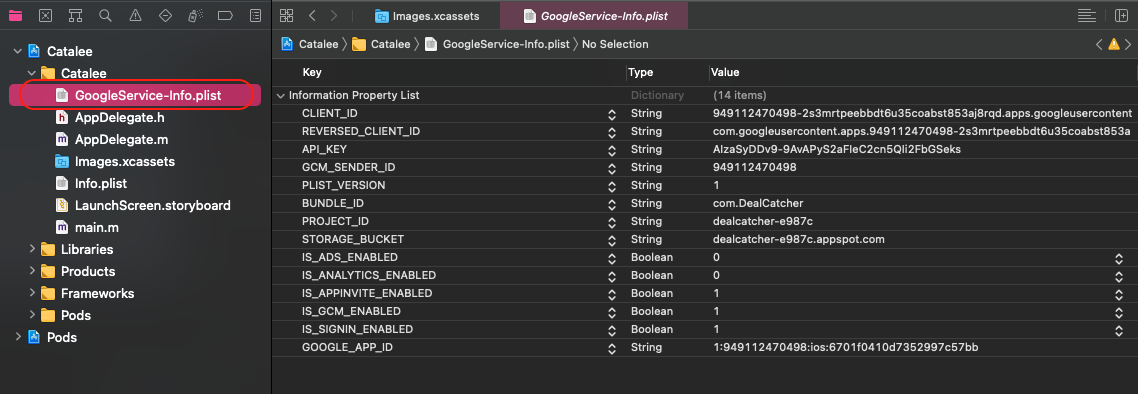
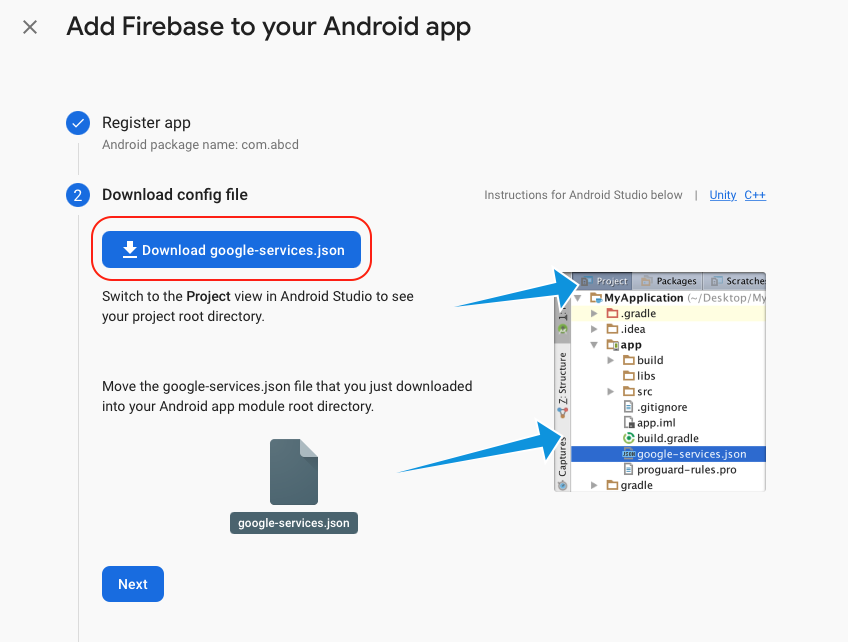
Catalee – Create and download google-services.json (Android)
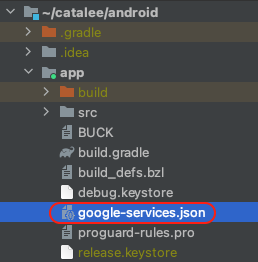
Move the google-services.json to ./android/app/ and rebuild
Catalee – google-services.json (Android)
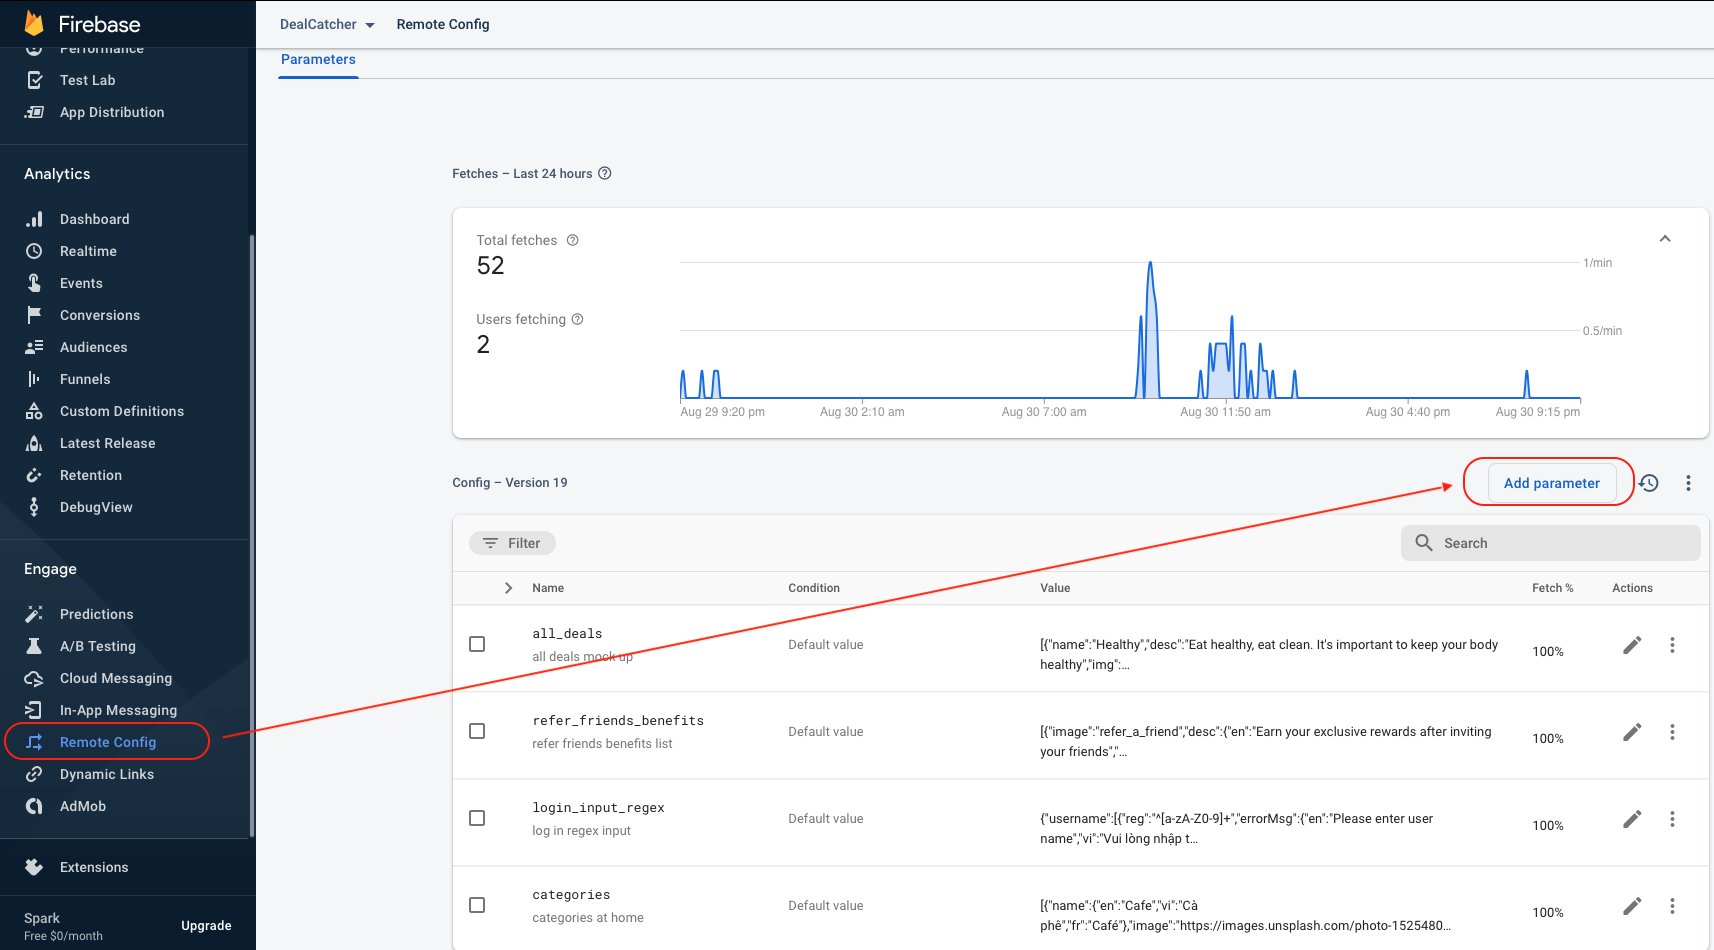
Remote Configs
Firebase Remote Config is a cloud service that lets you change the behavior and appearance of your app without requiring users to download an app update at no cost. You'll see an update in realtime
Note: Contact me hualuong23596@gmail.com with your email. I'll send you invitation to the Google Firebase project
This template currently implemented these configs below, you can free to add more to customize the user experiences
tabs_bar: Configs how many tab bar are shown
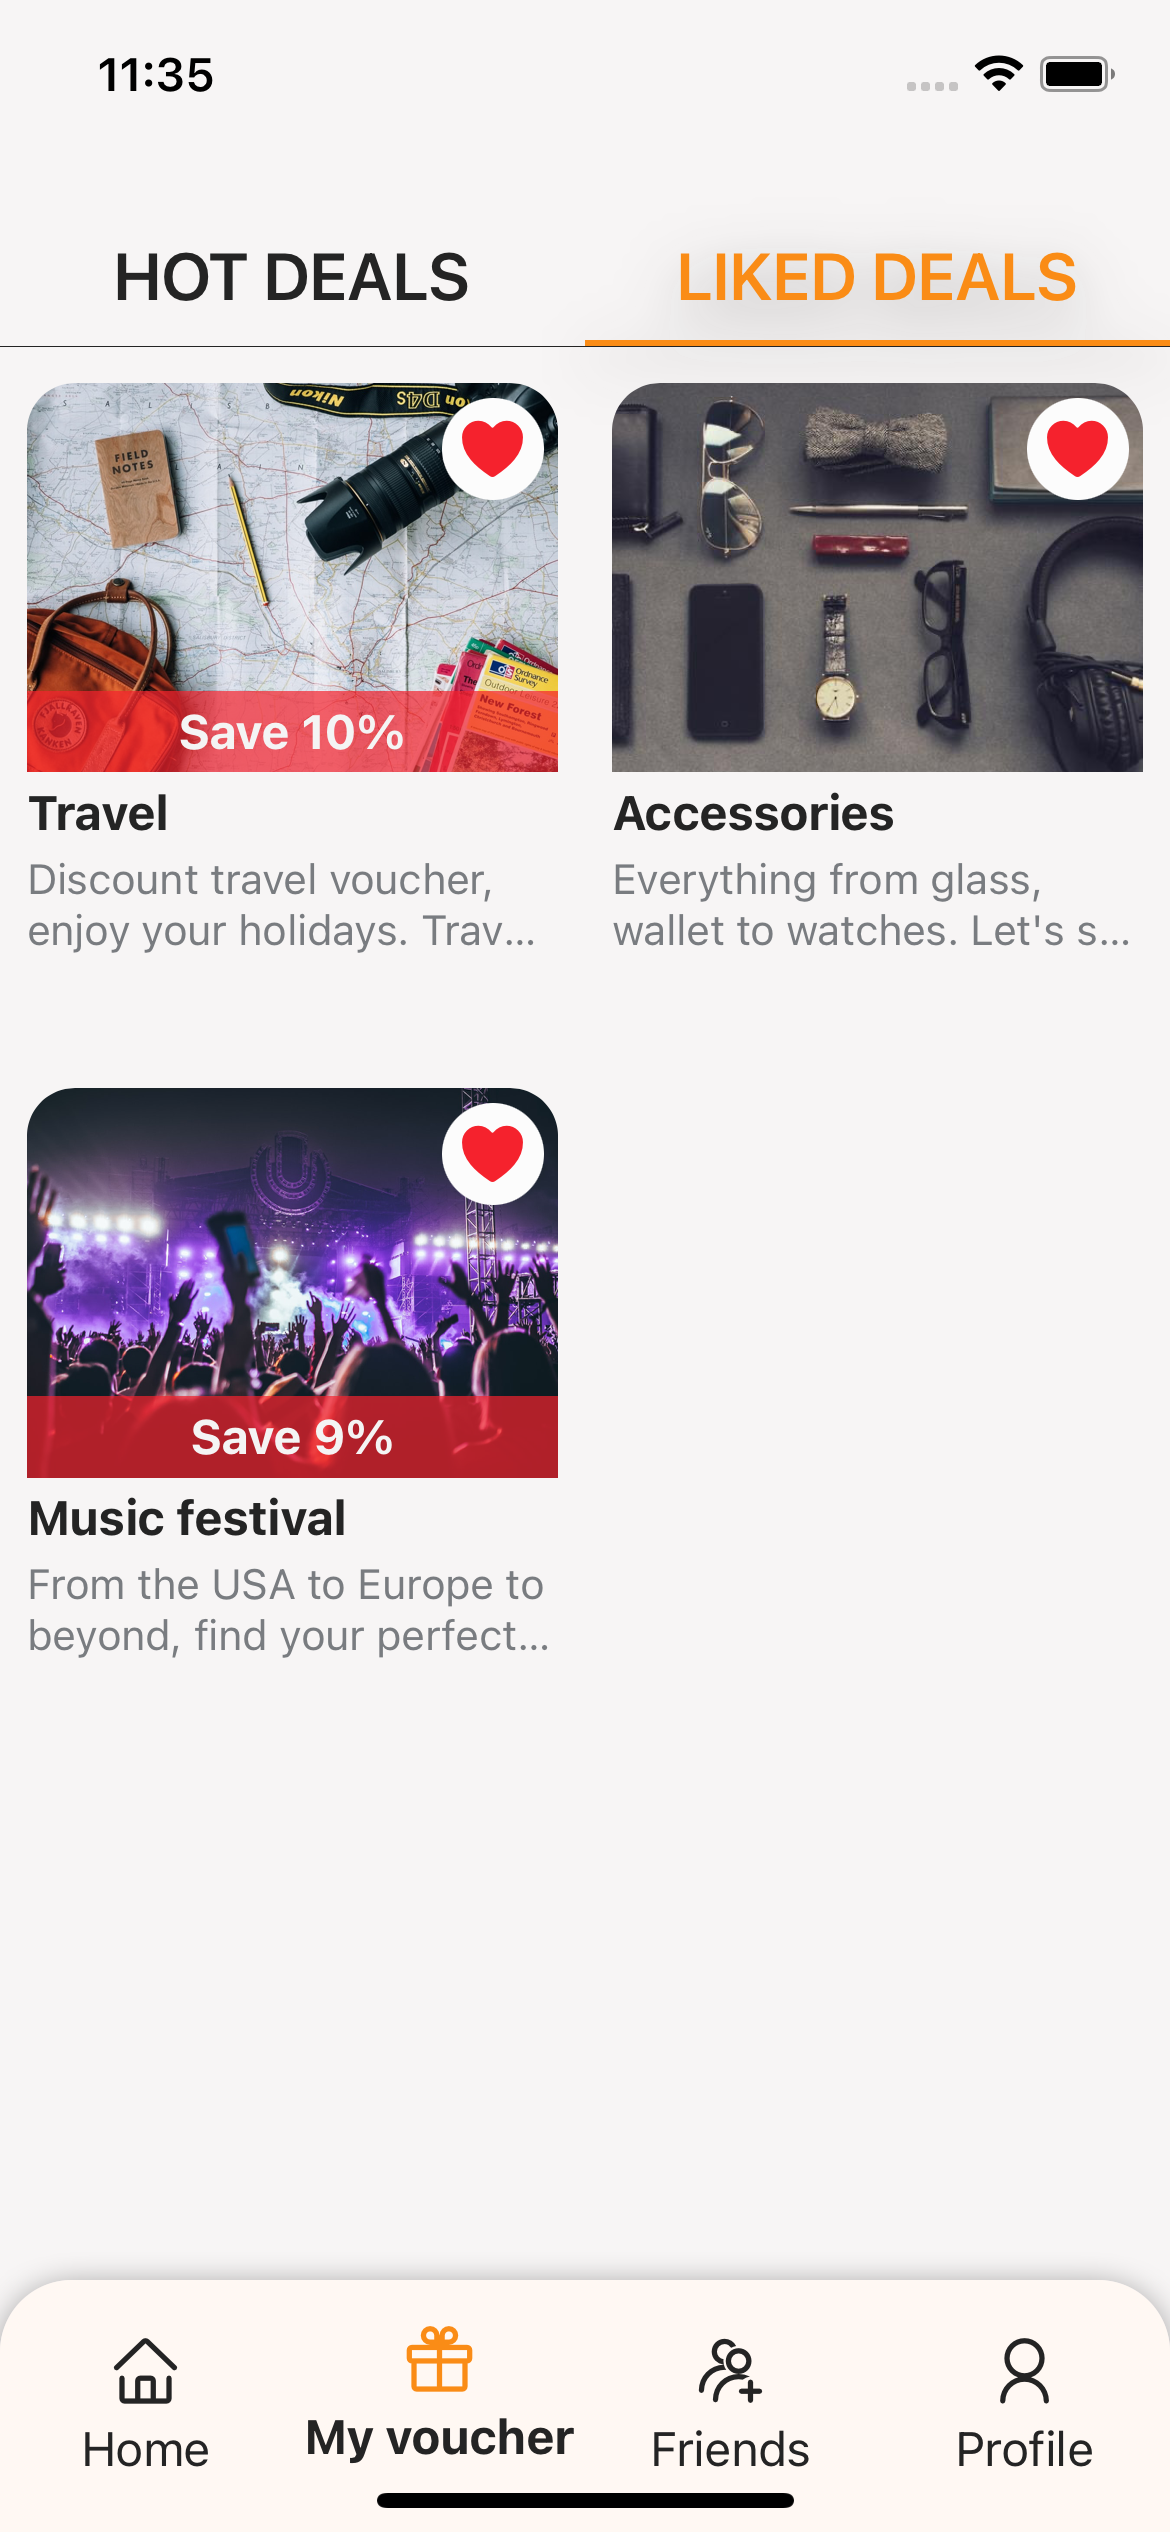
refer_friends_benefits: Show list of benefits in Friends screen
login_input_regex: Regex for input in log-in screen
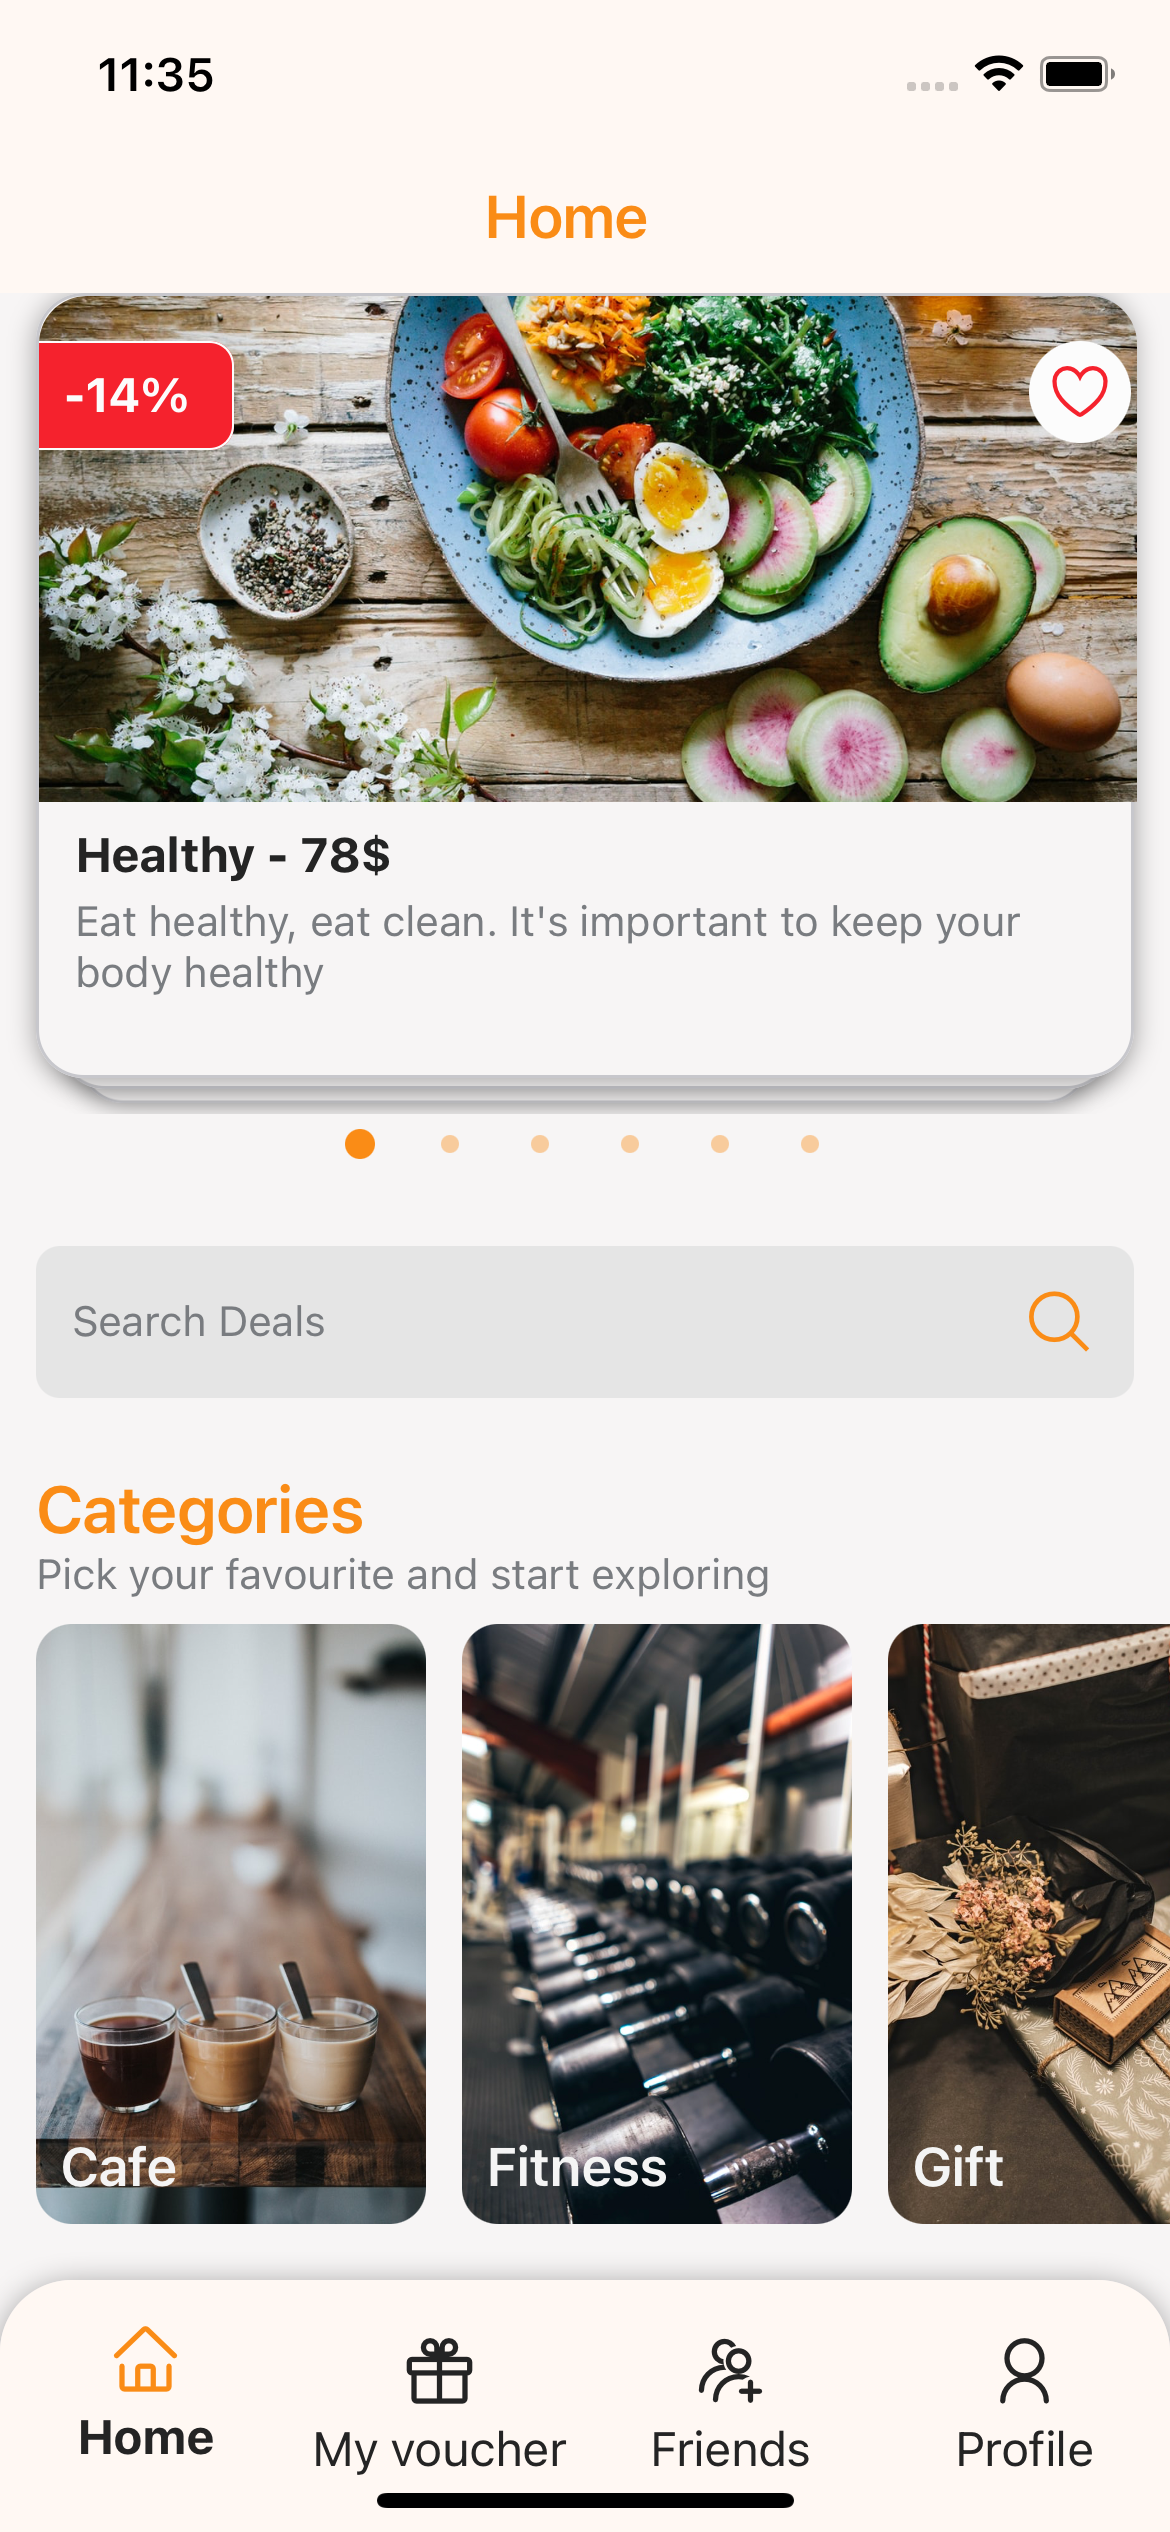
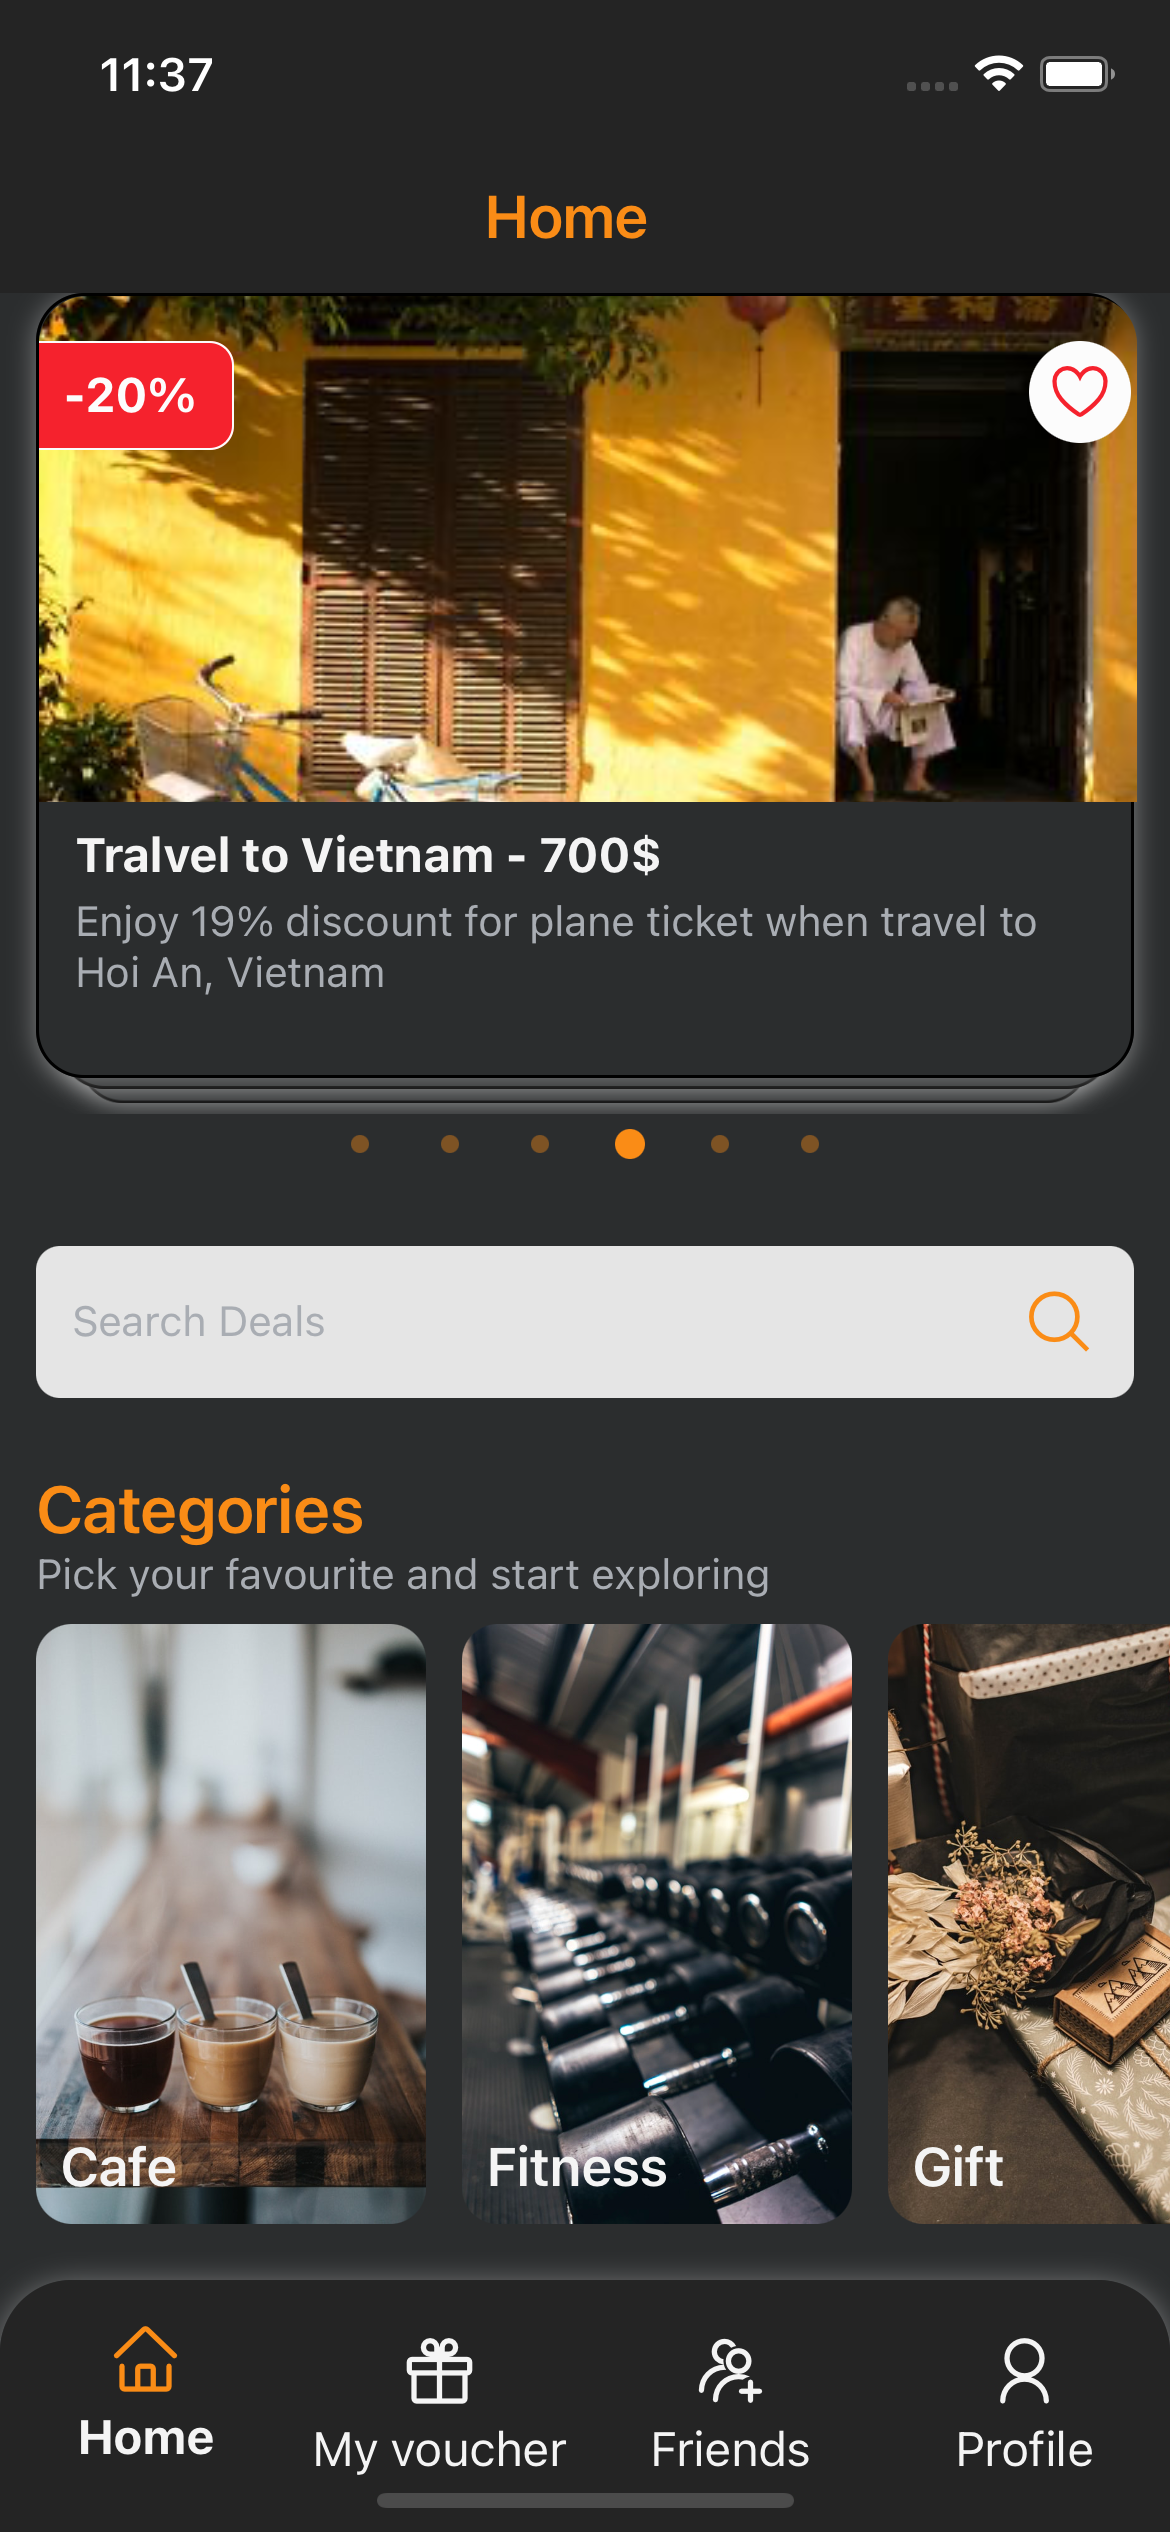
categories: Categories in Home screen
animated_suggestions: Animating suggestions bar at home
Let's watch these demo video:
In this video, we just added 2 new Cafe and Fitness to the categories list. After reloading app, the list show 2 newly added category to the front of the list according to the order in the array
In this 2nd demo, we added the 5th tab Event to the Tab Bar list. After reloading app, it show the Event tab
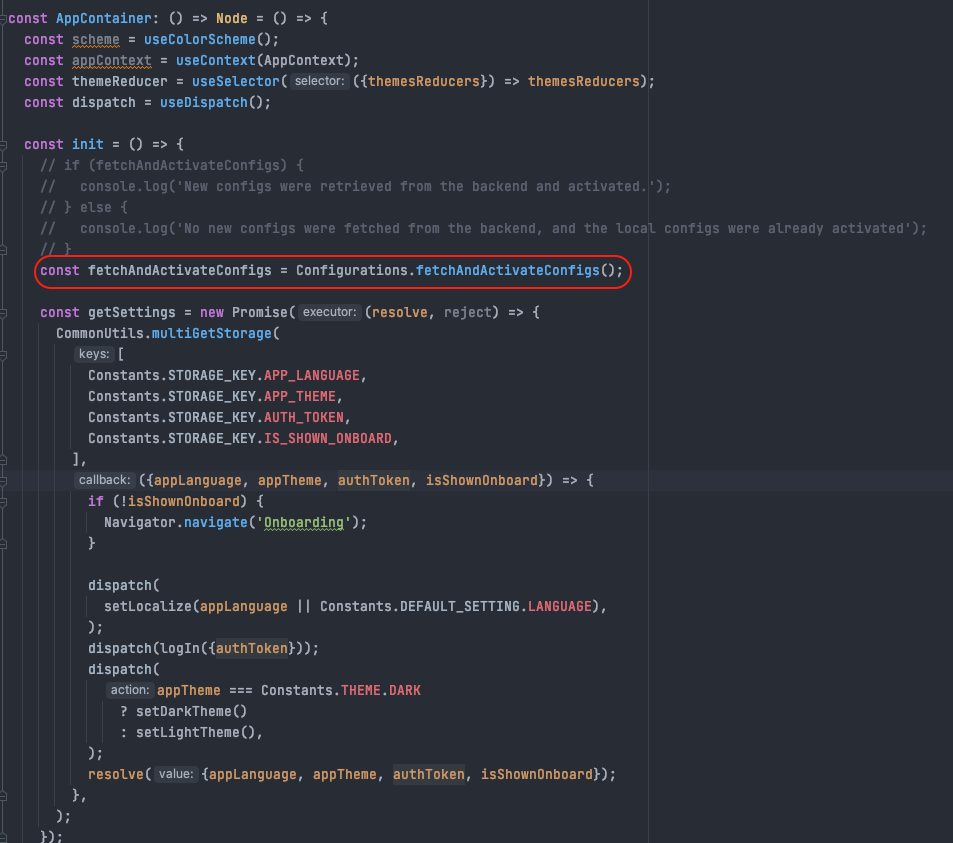
Remote configs is located in ./src/utils/Configurations.js init in ./src/navigation/AppContainer.js
If the result true new configs were retrieved from the backend and activated. Else if the result false no new configs were fetched from the backend, and the local configs were already activated
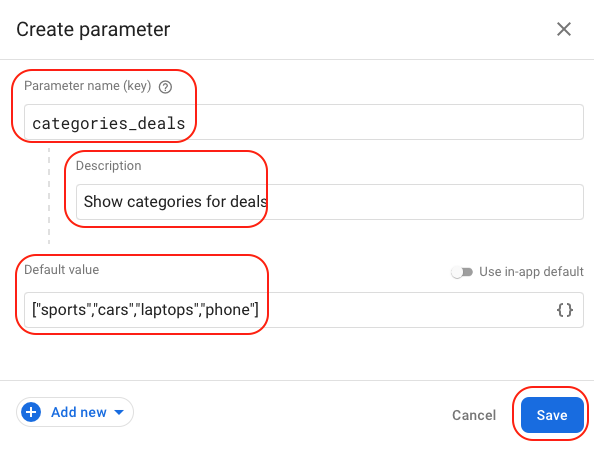
Fill the all the info and then Save Note: Default value can be Object or Array
Catalee – Create parameter
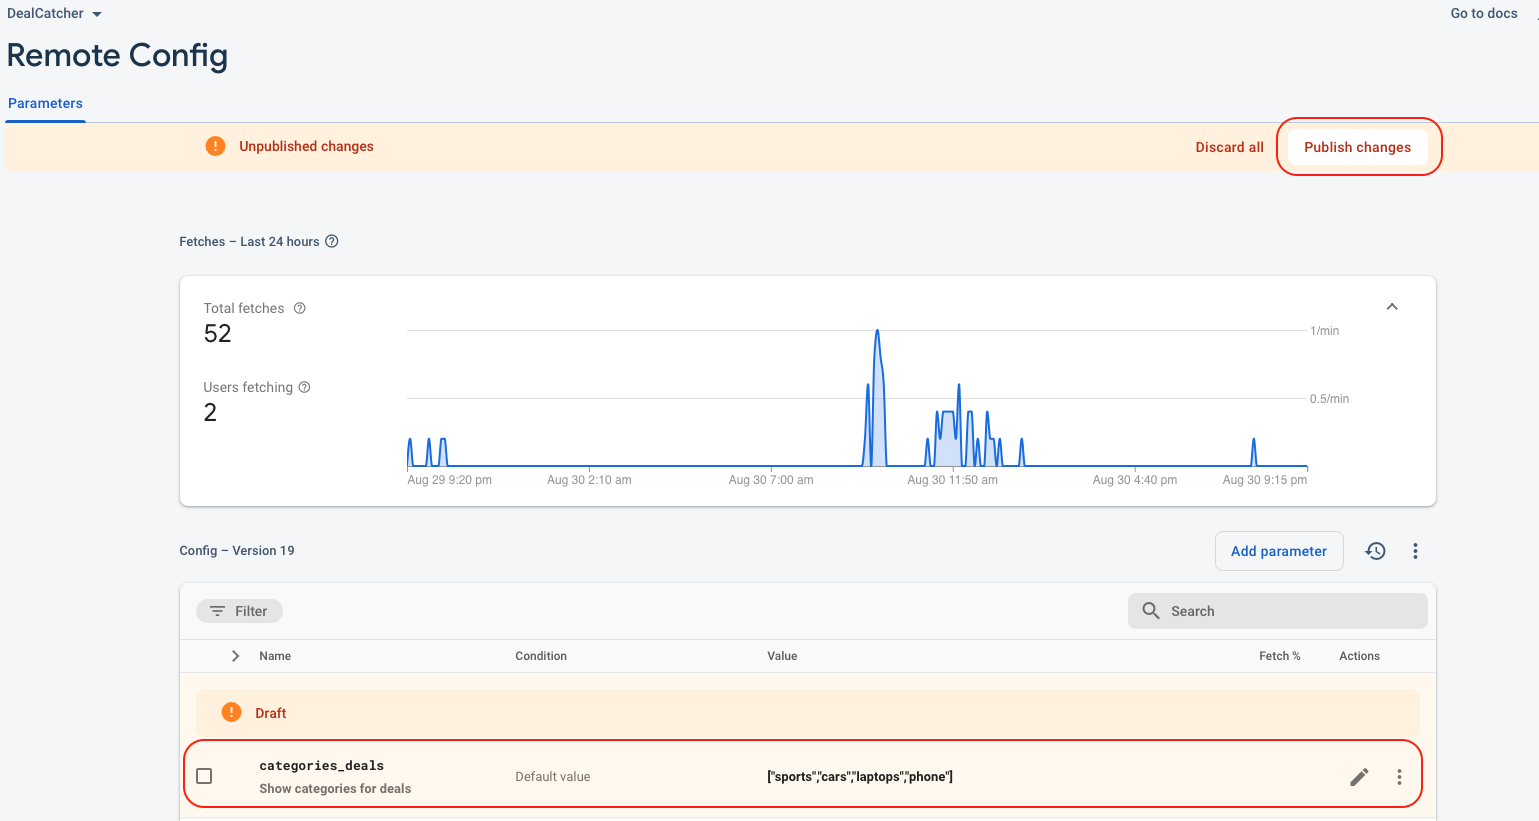
Press Publish changes and reload the app. You'll get new configs
Catalee – Publish changes
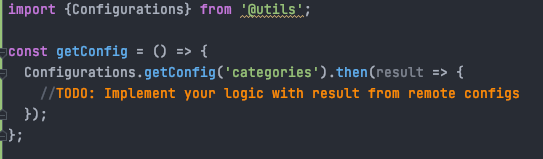
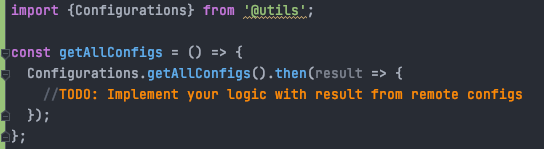
How to use Remote Configs
Import Configurations from '@utils'
The function getConfig is a Promise function take 1 string params as the config's name and return the configs
Catalee – Get config
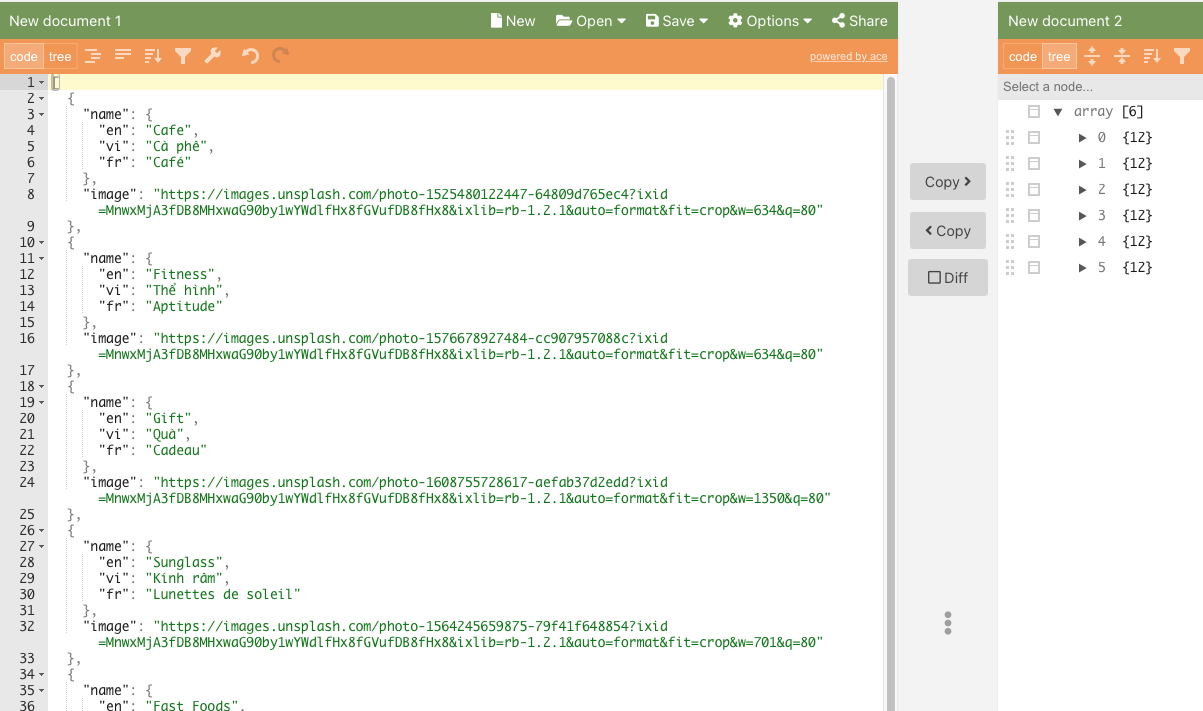
The function getAllConfigs is a Promise and return all the configs
Catalee – Get all configs Catalee – Remote configs example response of the .getConfig('categories')
Deeplink
Deep links are a type of link that send users directly to an app instead of a website or a store. They are used to send users straight to specific in-app locations, saving users the time and energy locating a particular page themselves – significantly improving the user experience.
Using your Xcode and open file ./ios/Catalee.xcworkspace
Catalee – Change Icon (IOS)
Android
Navigate to ./android/app/src/main/res/.. and put your icon to the correct resolution
Catalee – Change Icon (Android)
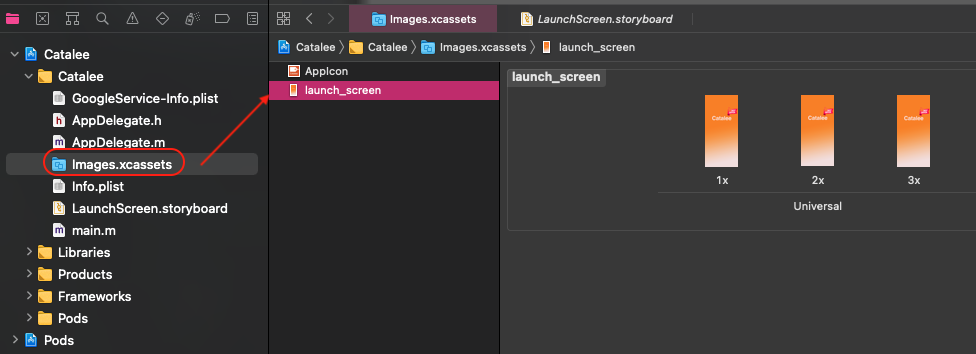
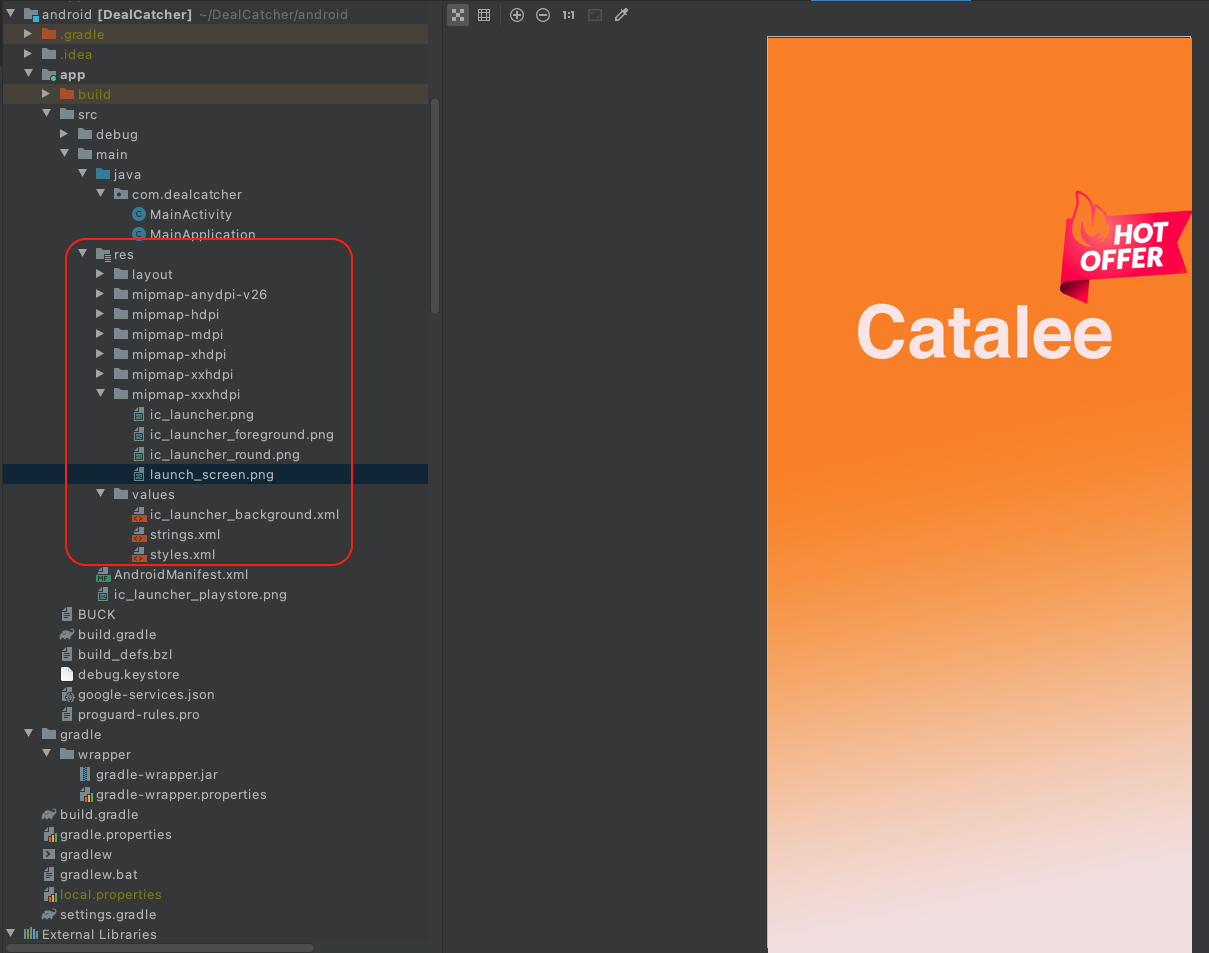
Change the SplashScreen
You can use appicon.co to make your Splash screen for both iOS and Android
Note: Keep the same file name
IOS
Using your Xcode and open file ./ios/Catalee.xcworkspace
Catalee – Change SplashScreen (IOS)
Android
Navigate to ./android/app/src/main/res/.. and put your splashscreen to the correct
resolution
Catalee – Change SplashScreen (Android)
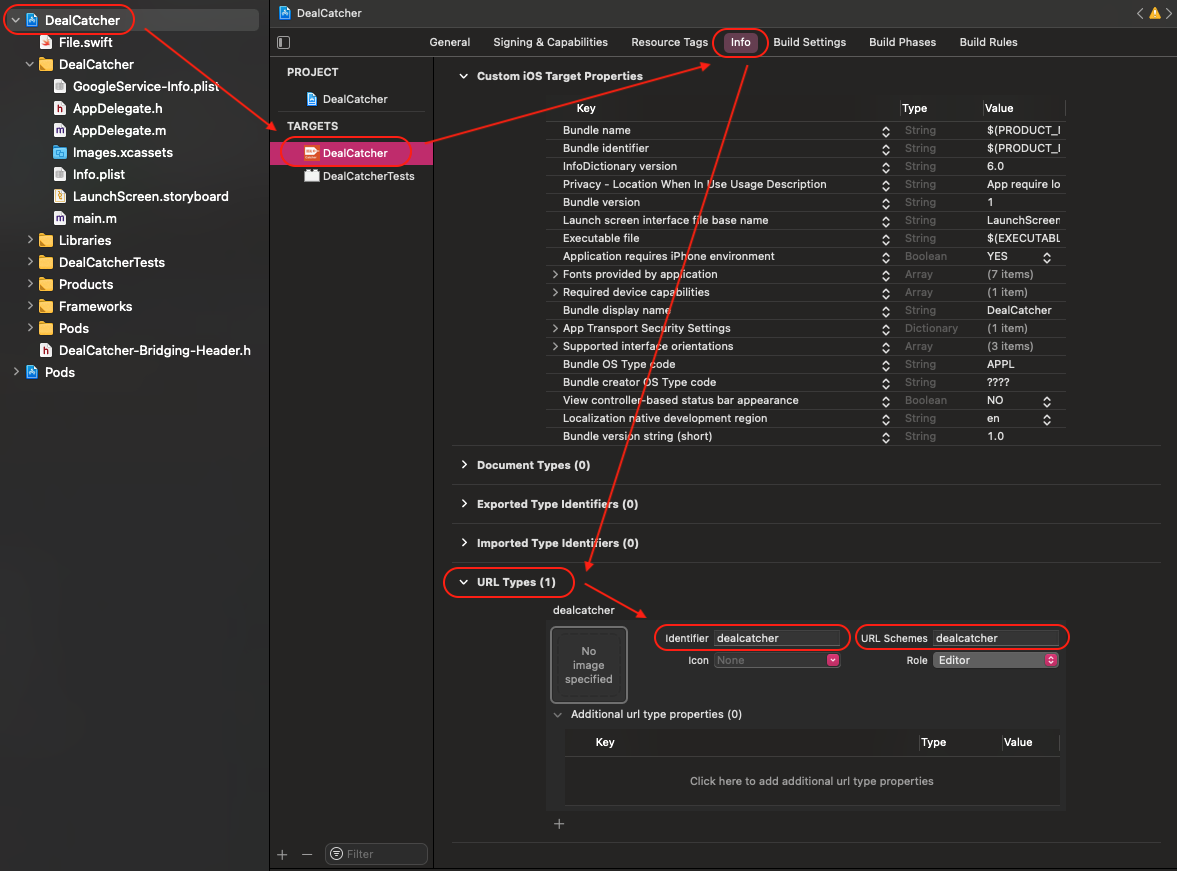
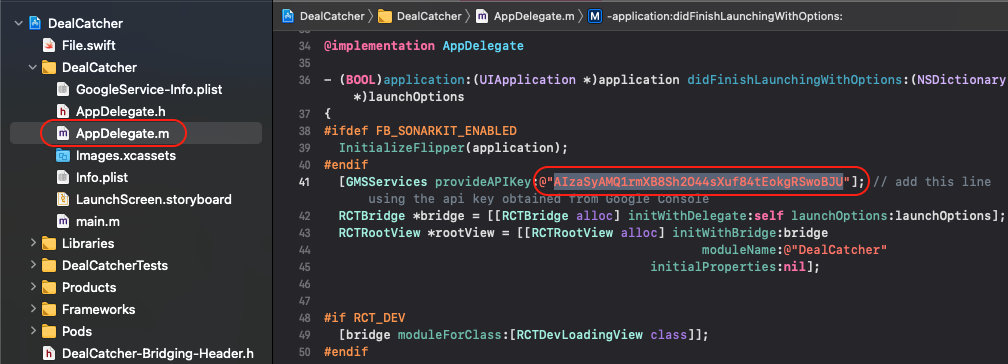
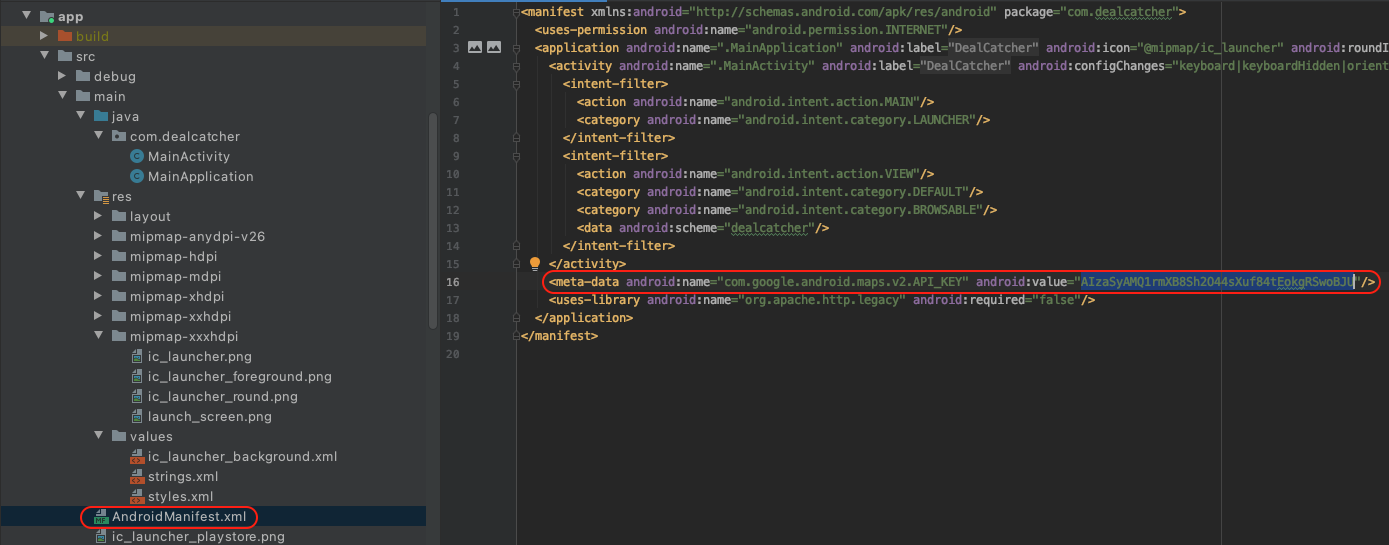
Change GoogleMap Key
First please check how to register GoogleMap key from https://developers.google.com/maps/documentation/embed/get-api-key Search
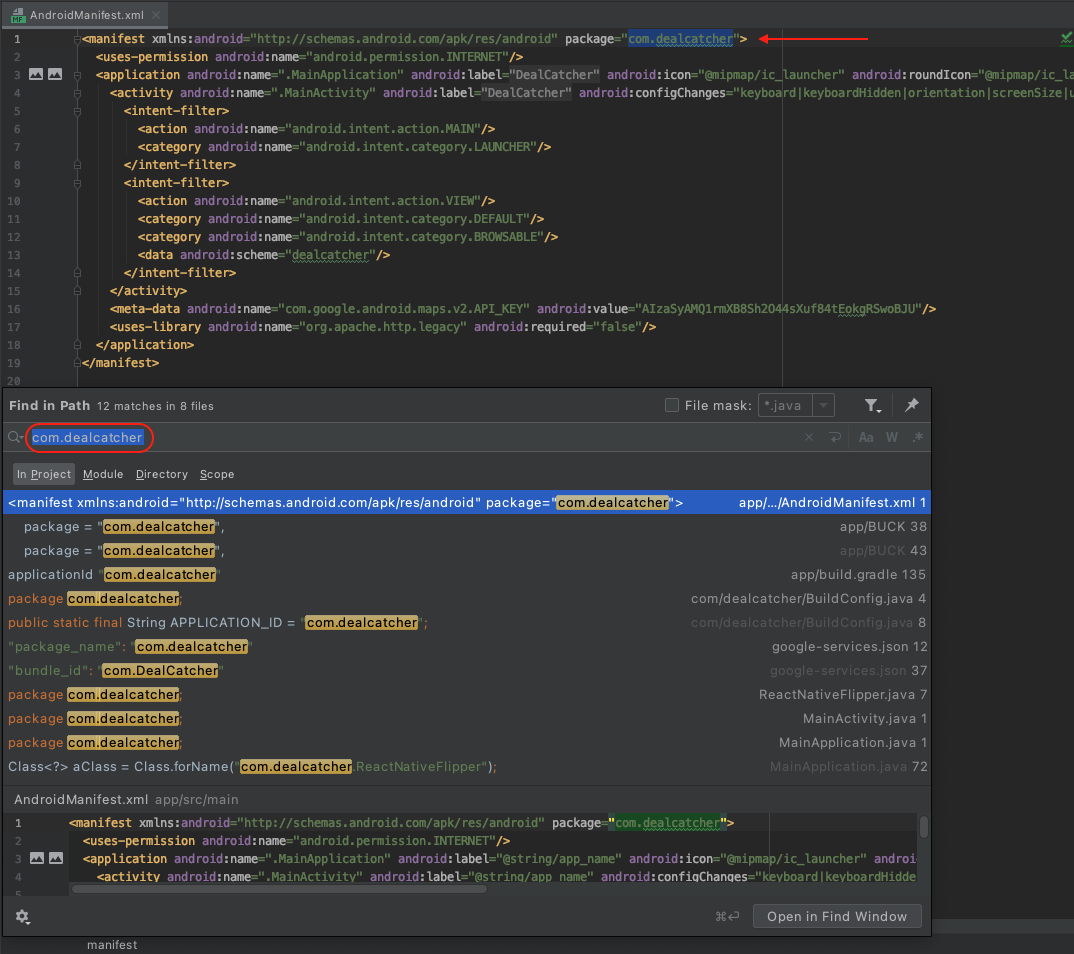
in project exist GoogleMap key AIzaSyAMQ1rmXB8Sh2O44sXuf84tEokgRSwoBJU File
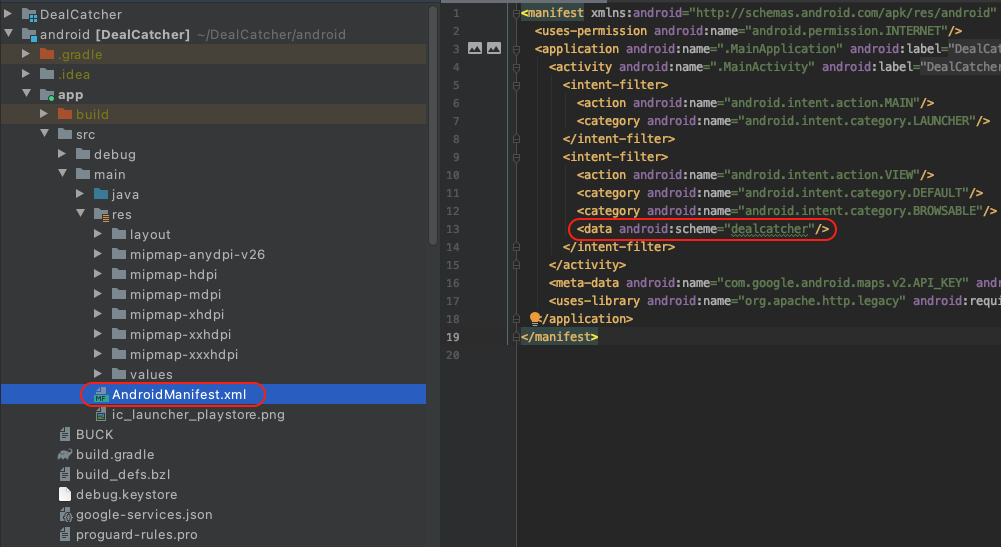
locate – Ios: ./ios/Dealcathcer/AppDelegate.m – Android: ./android/app/src/main/AndroidManifest.xml
IOS
Catalee – Change GoogleMap Key (IOS)
Android
Catalee – Change GoogleMap Key (Android)
FAQ
Dose it connect any API ?
No, It dose not. It just included template only. We do not connect any API. You have to develop by
yourself for matching with your biz.
Dose it collection user information ?
No, It dose not. The mobile template application just simple application with UI/UX.
Dose it use 3rd party for develop UI/UX like React NativeBase, React Native Elements ?
No, It dose not. It is using pure React Native for develop. If you would like to include React
NativeBase or React Native Elements … You can do that.